
TASK : Build an enclosure for an electronics project.
1. Inspiration
I wanted to make an enclosure for the phys-comp. Many ITPers buy the plastic tool boxes to house phys-comp materials like the arduino, the sensors, and the wires, etc. So I wanted to make a wooden box that can house phys-comp stuff.
2. PLAN
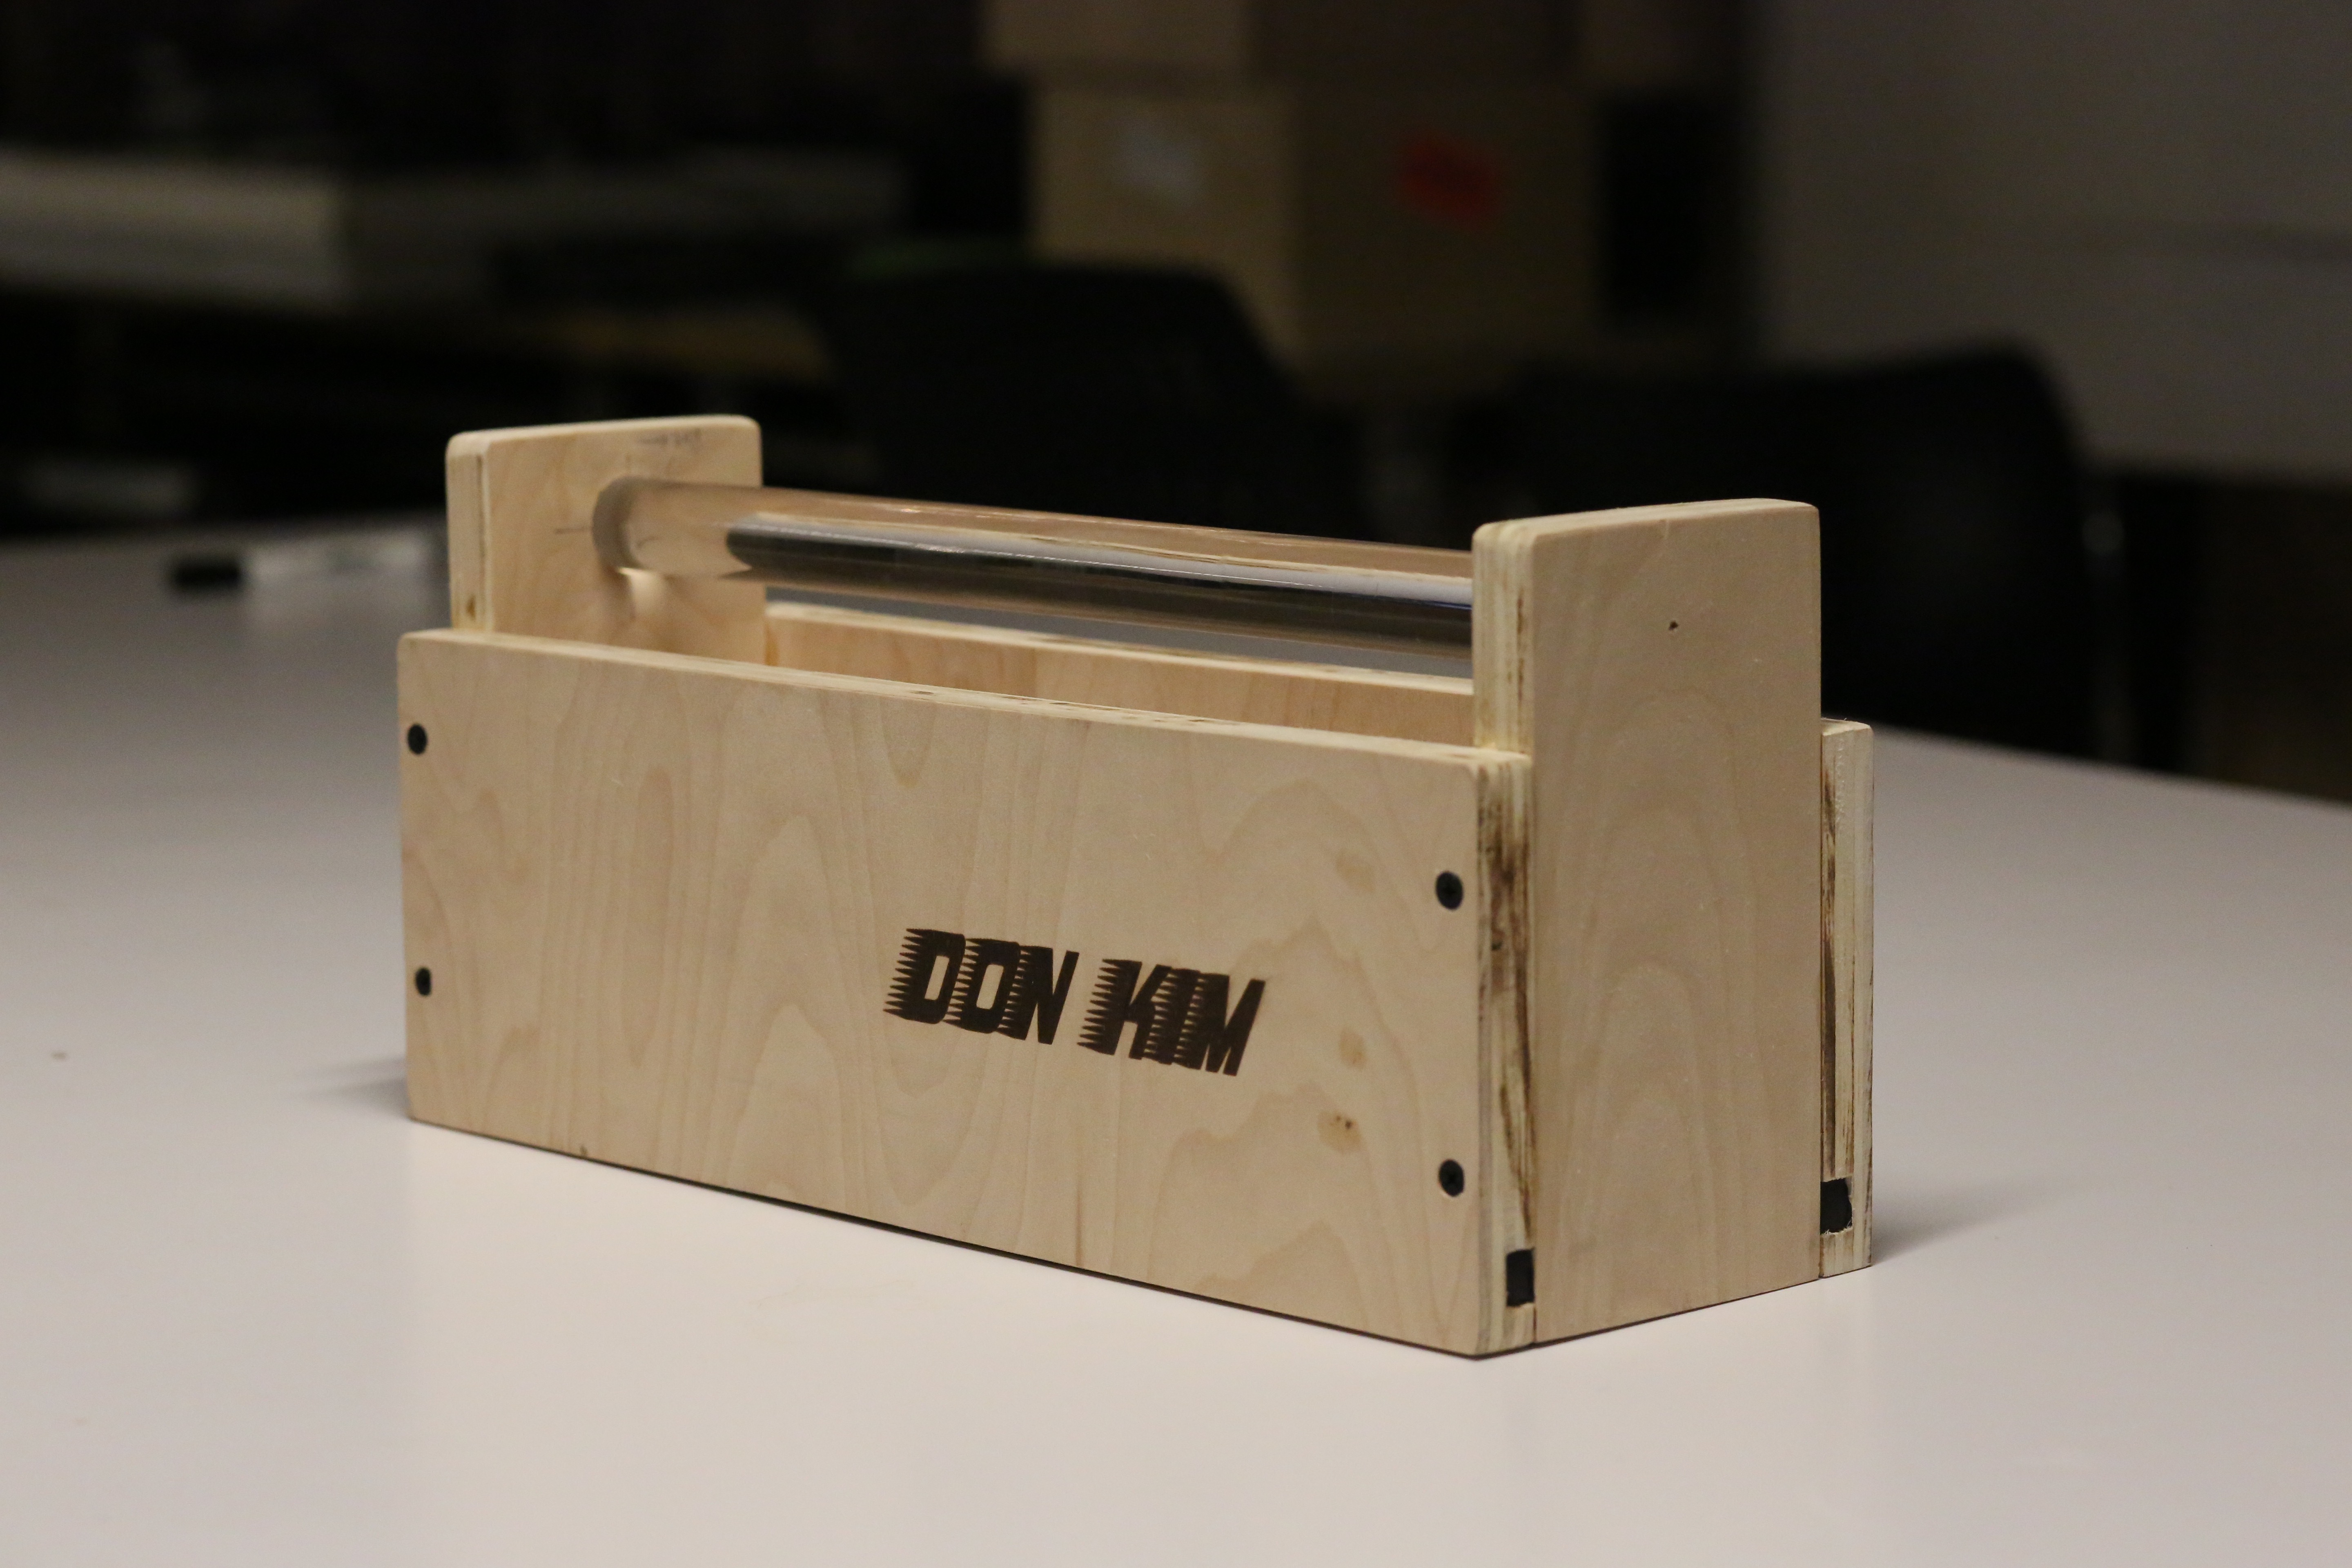
Since I needed to make 4 walls, 1 bottom and 1 top for the box, I planned to use the router. First, I thought of using acrylic panel to cover the top, but after finding a nice acrylic bar, I decided to make it as the open top wooden tool box.

3. Execution
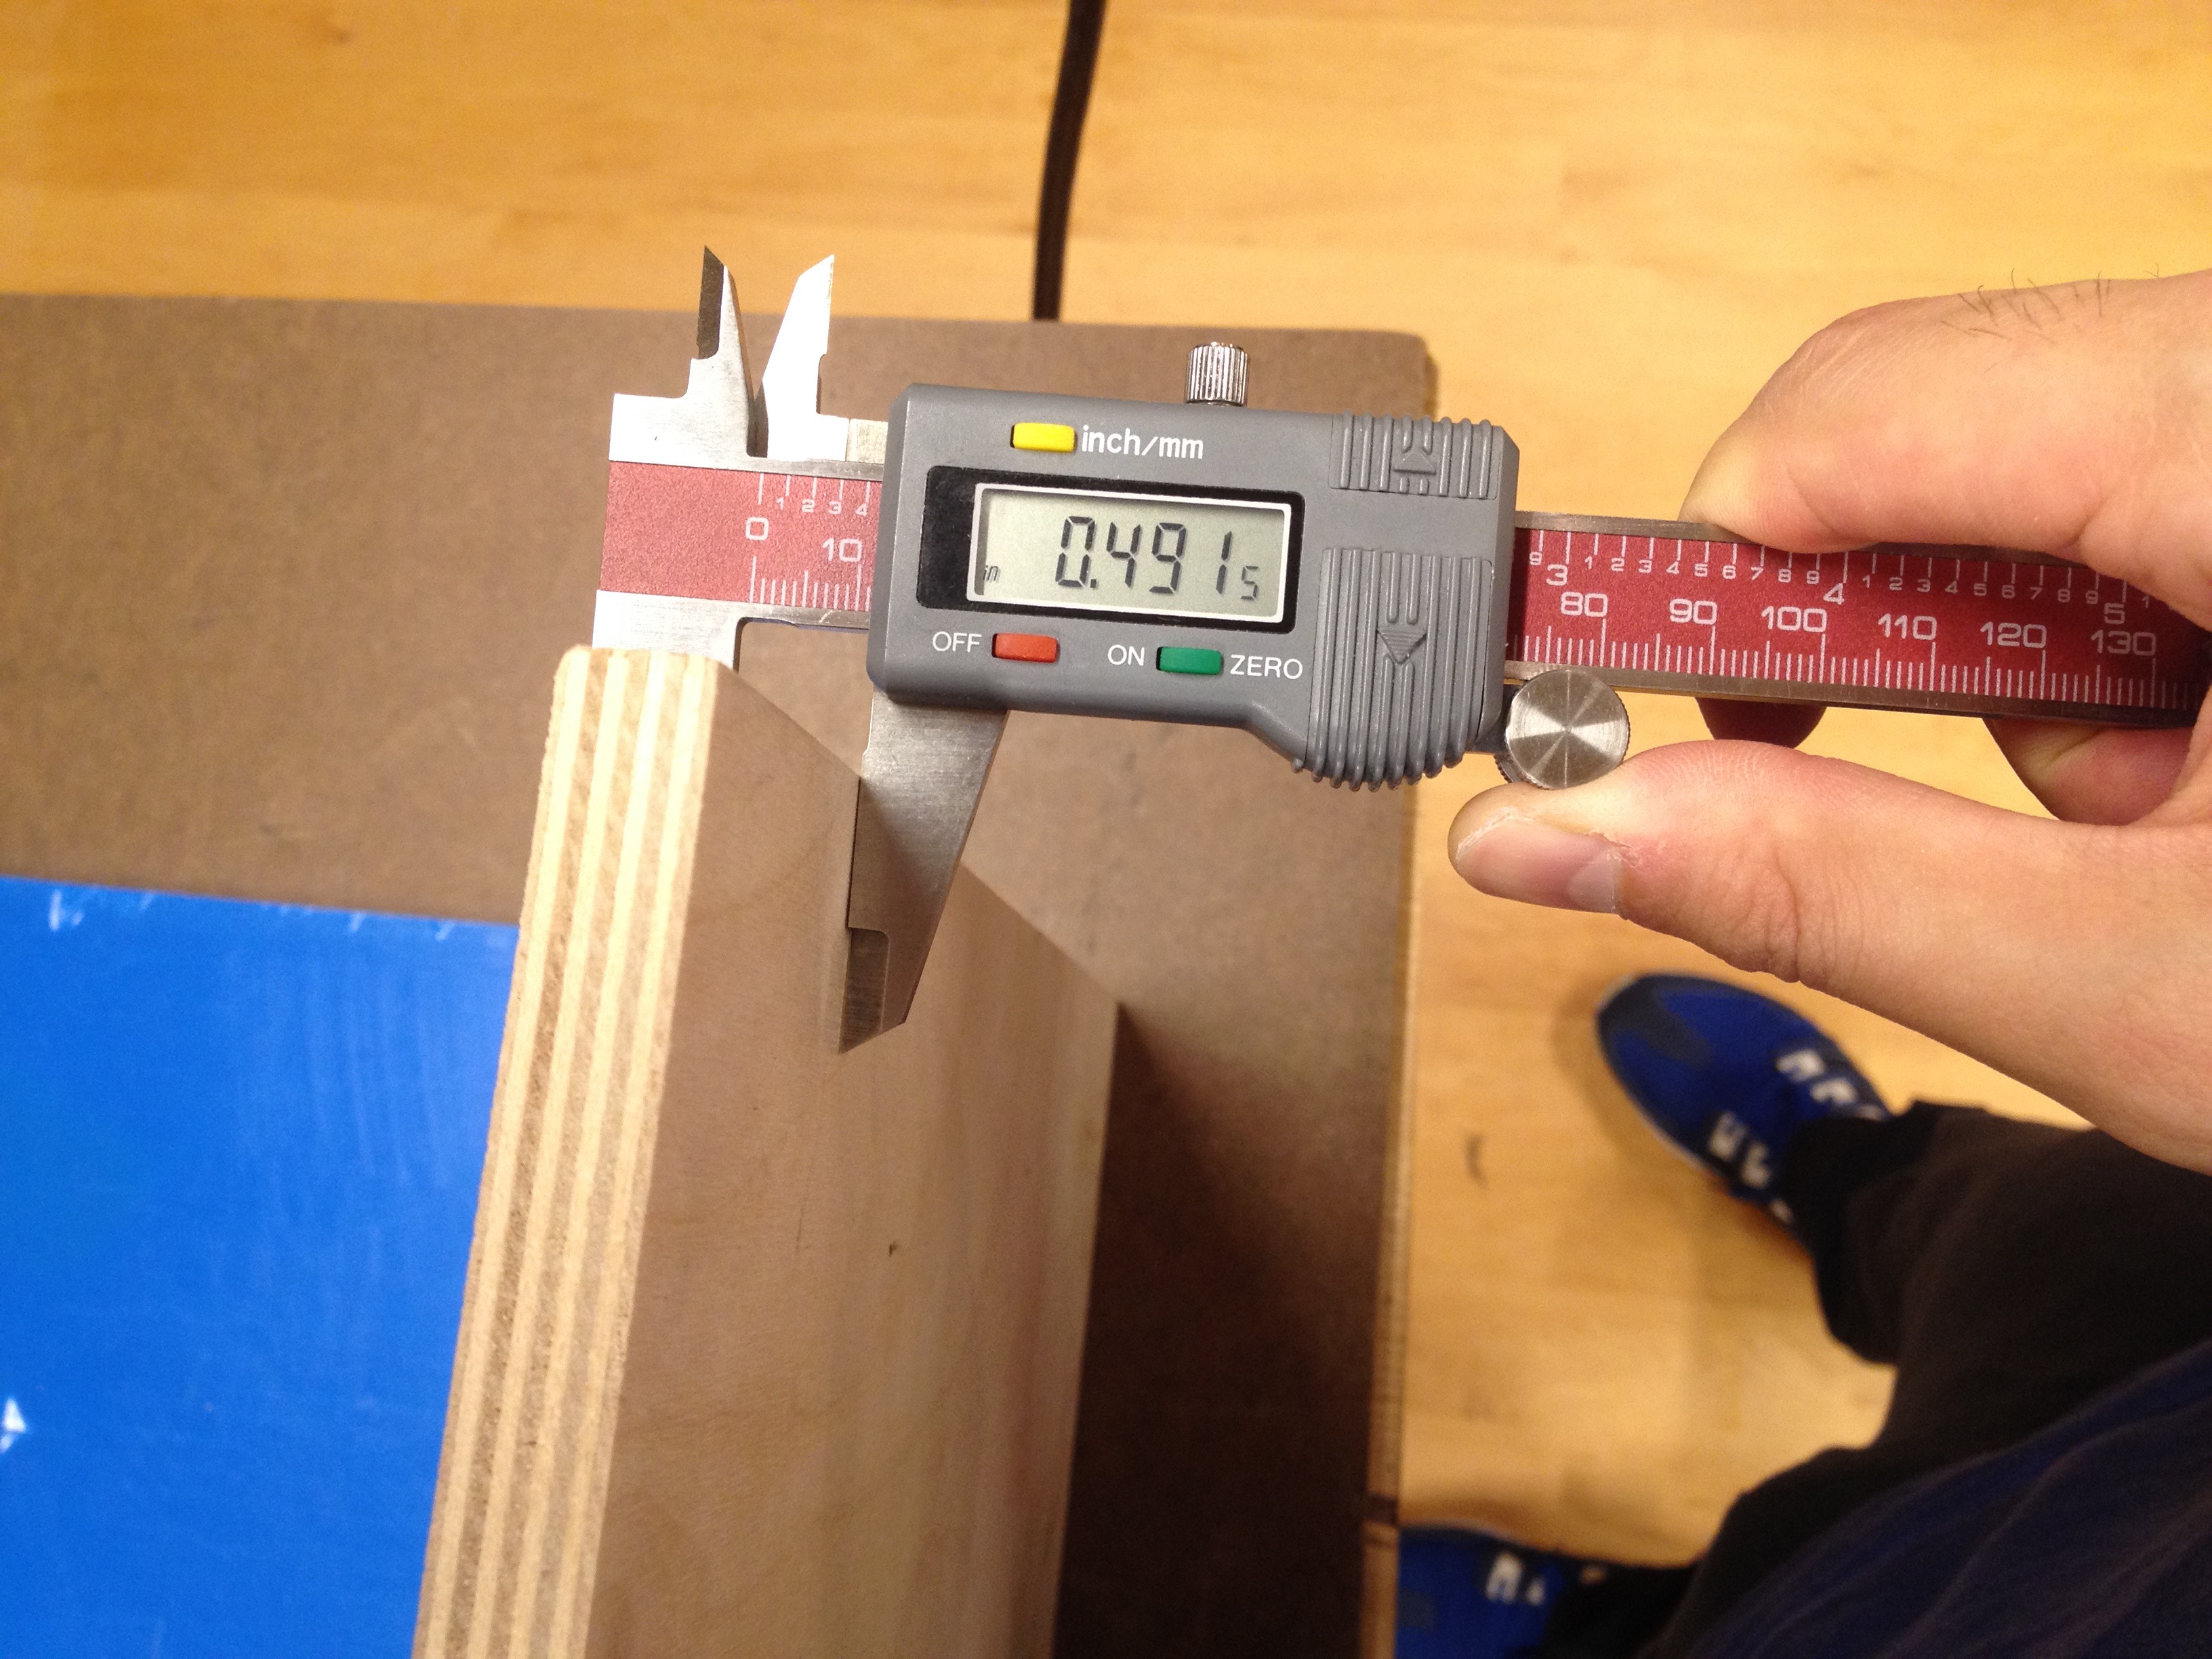
A.[Caliper] I measured the thickness of the router bit and the wood panel.

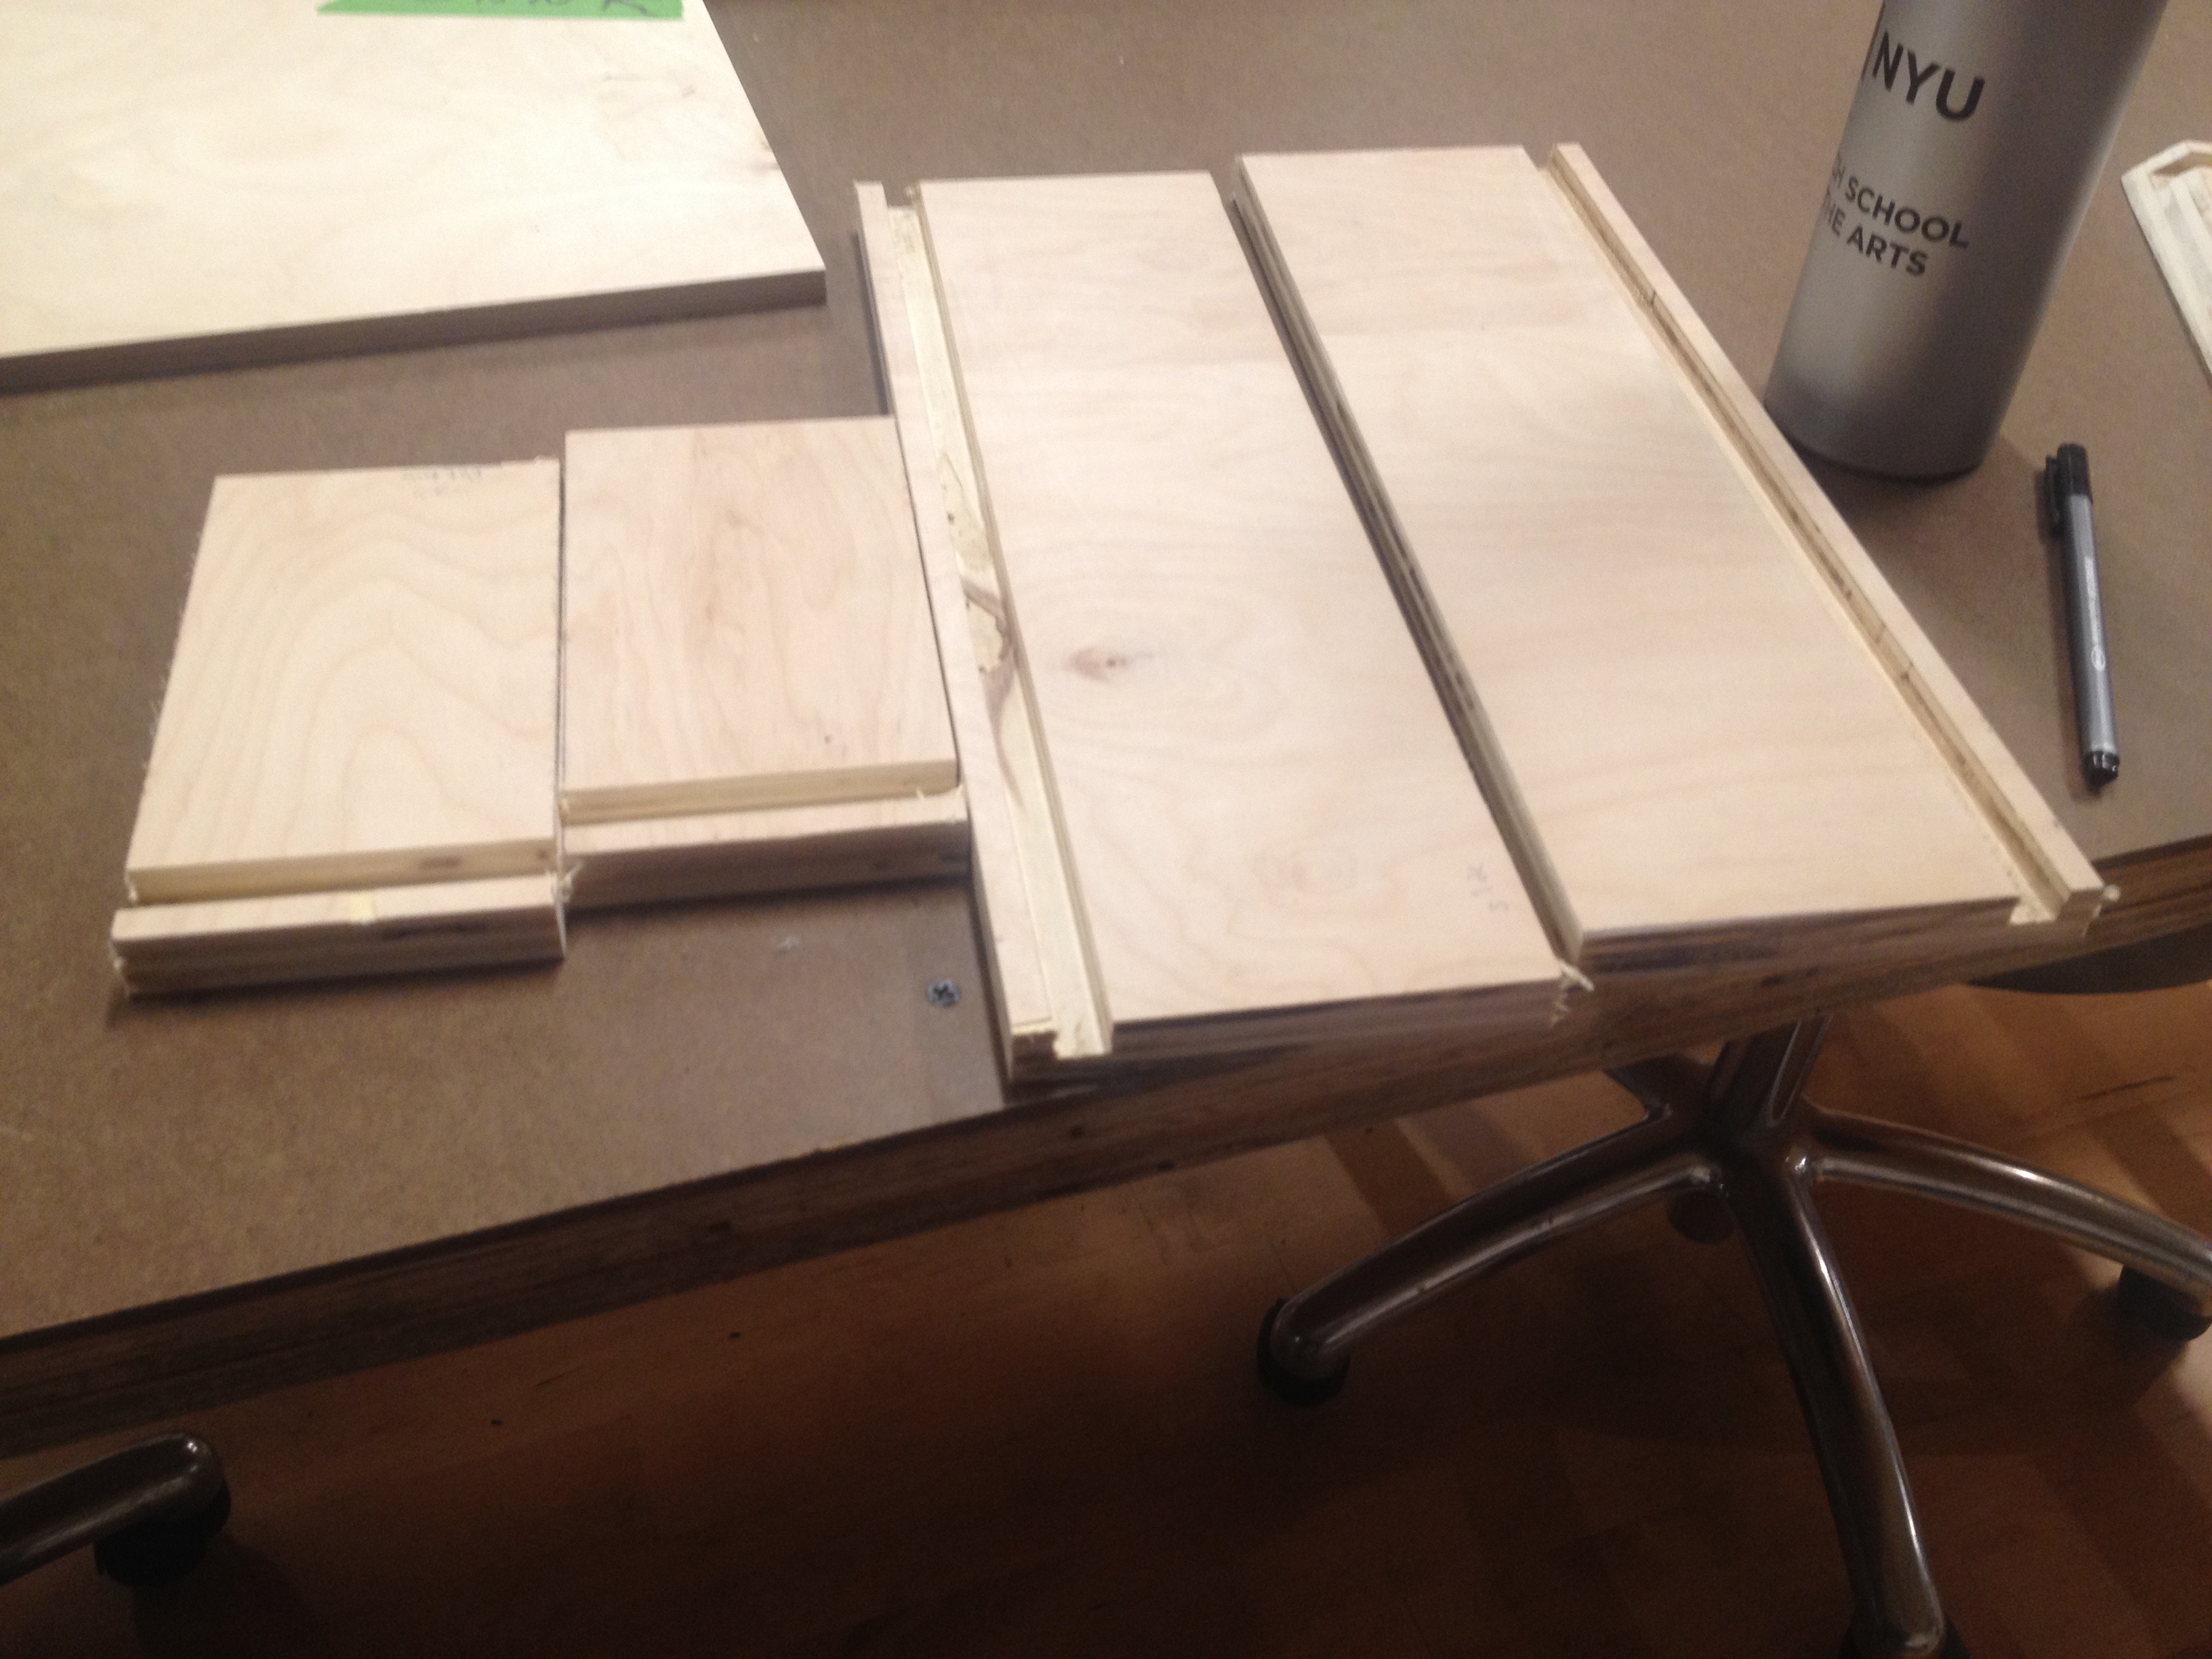
B. [Machine Saw] Since the measurement was set, I used the machine saw to cut the board. The board’s width was wide so I cut twice. However, instead of cutting twice , I could’ve used the panel saw and cut like a loaf of bread.


C. [Router] After cutting them, I used the router to make the routes. The routes allow them to fit together. Now I am more aware of the right amount of cut of the router. (Little by Little).

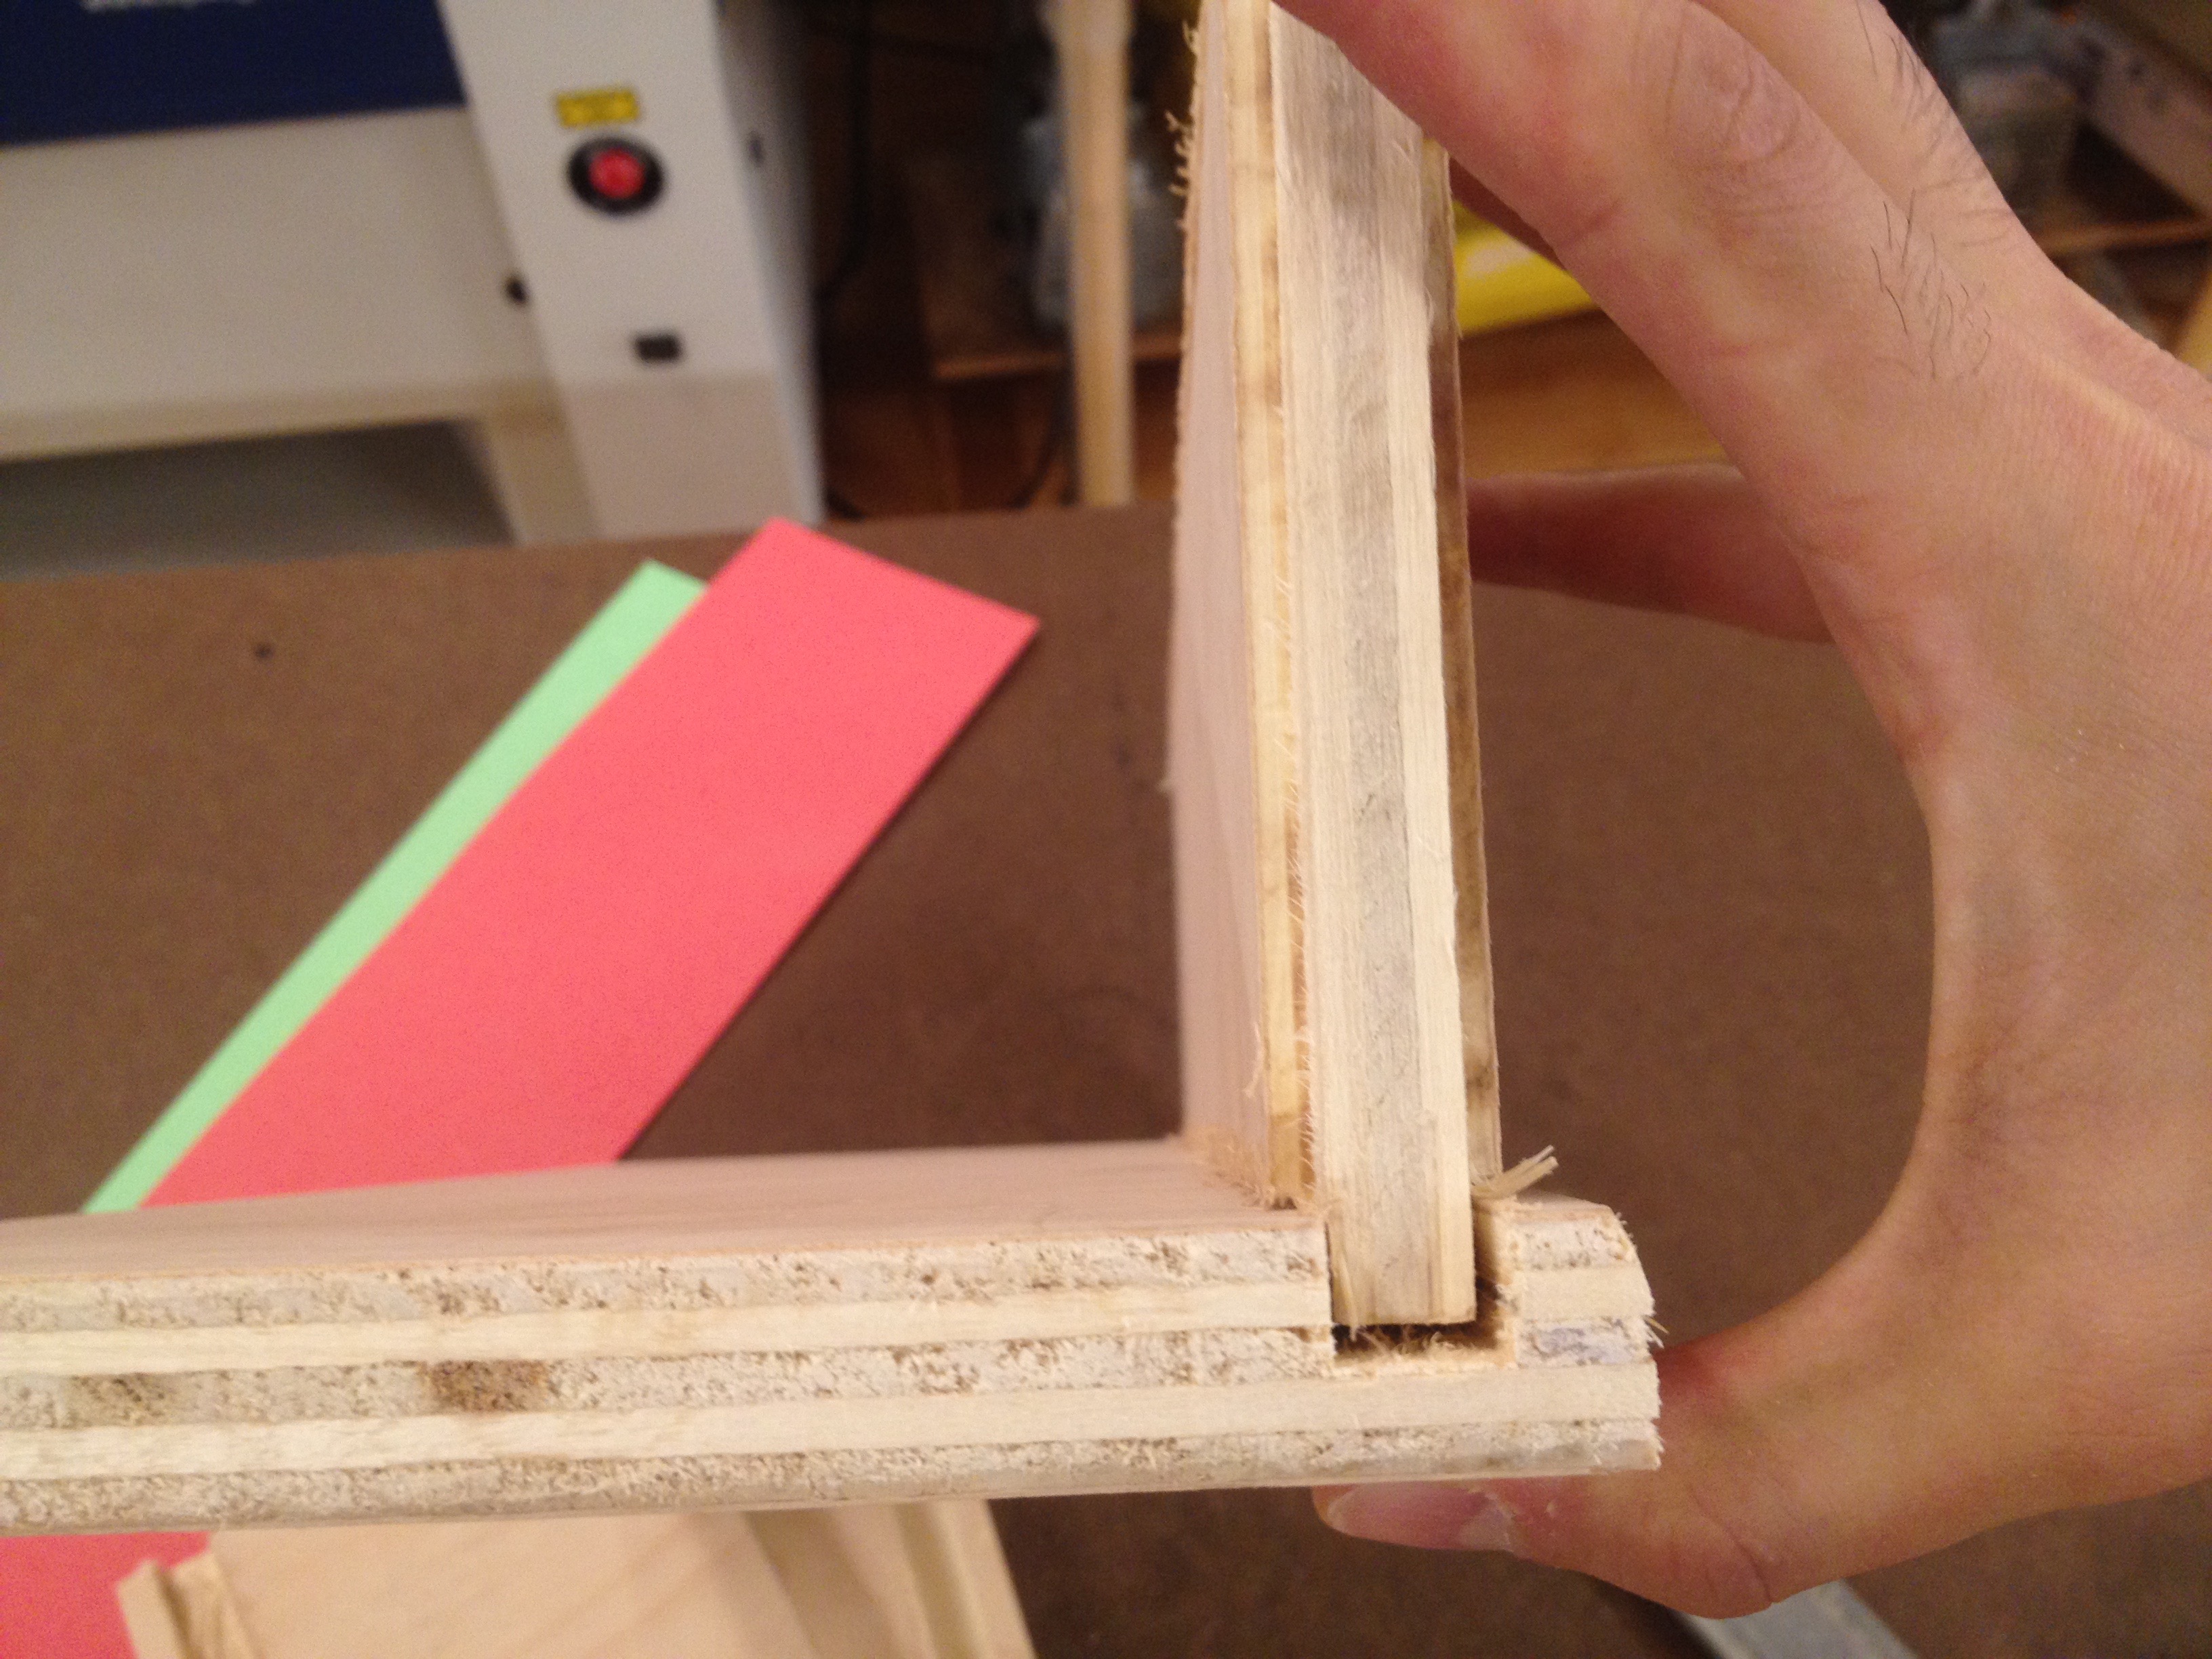
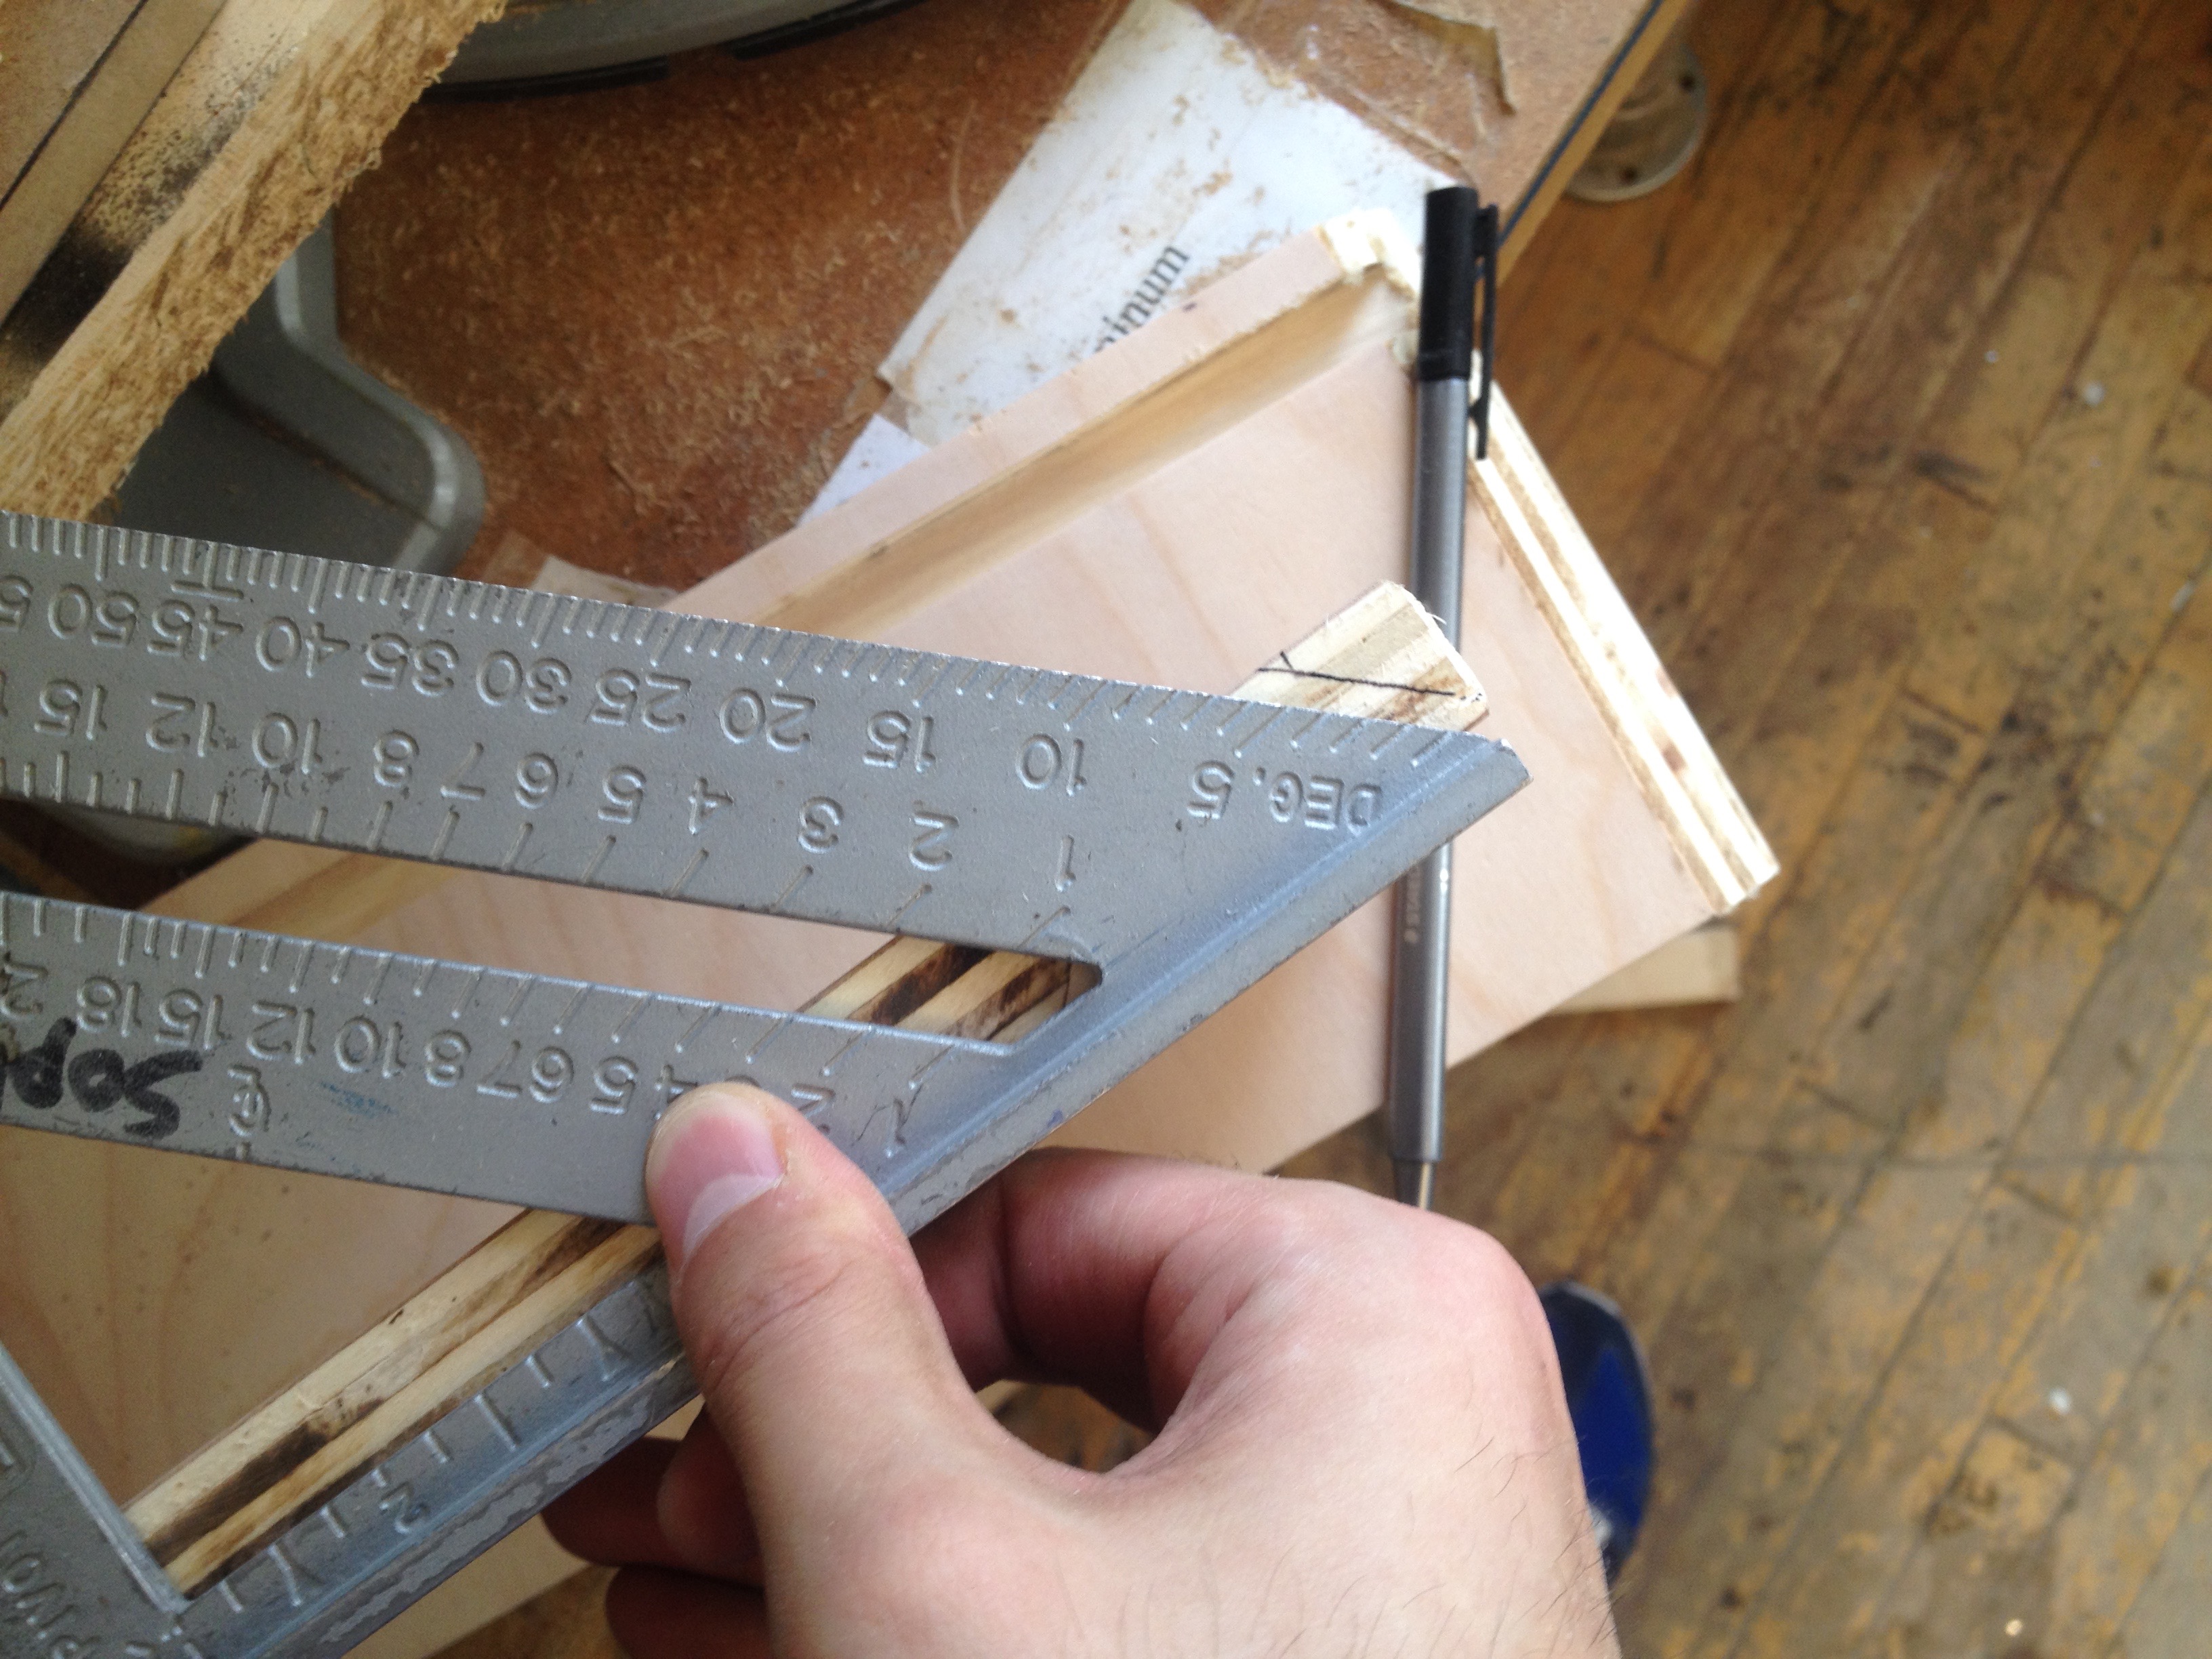
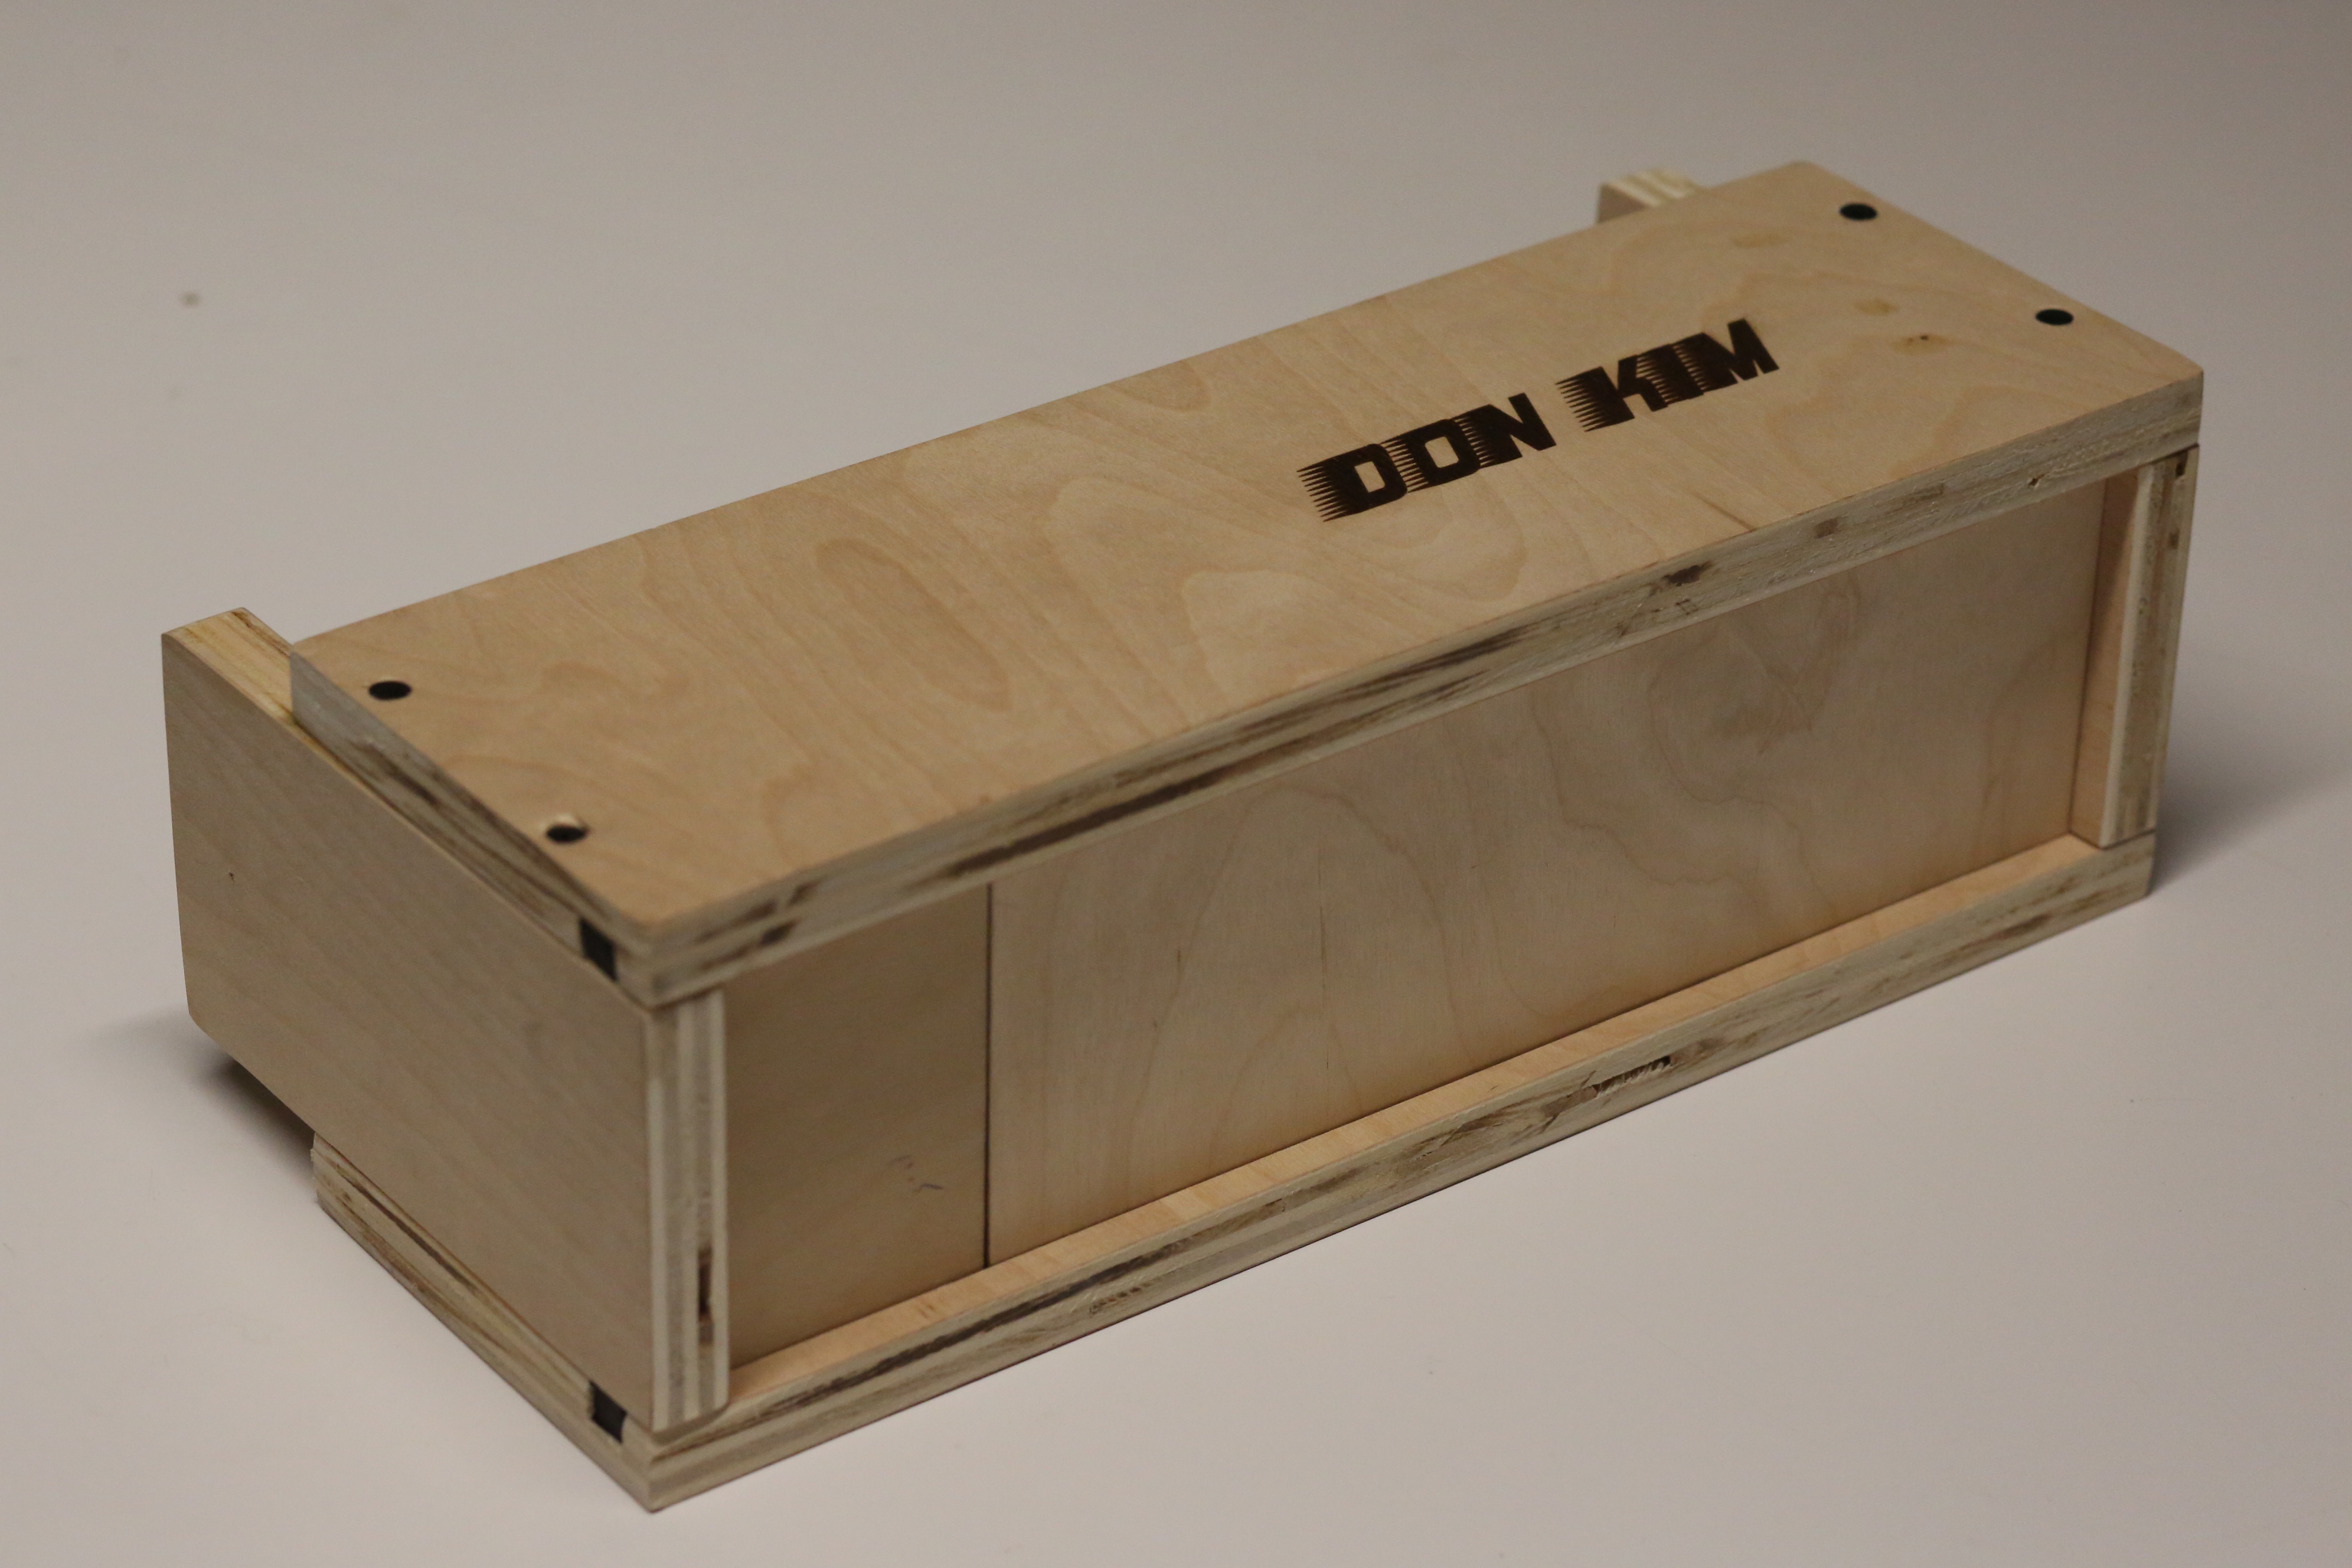
D. [Machine Saw/ Sanding Machine, Speed Square] Now, I wanted to make the box by the minor joints(45°) which looks cool. Looking good does not mean working good…… I used the Machine Saw which seemed making 45° well but the two pieces that I made with the sanding machine was awful. The sanding machine sanded the surface in a concave which made me unable to put them together. Also the two walls got shorter because the amount of the minor joint were gone. As a result, the bottom piece became longer than the original design.

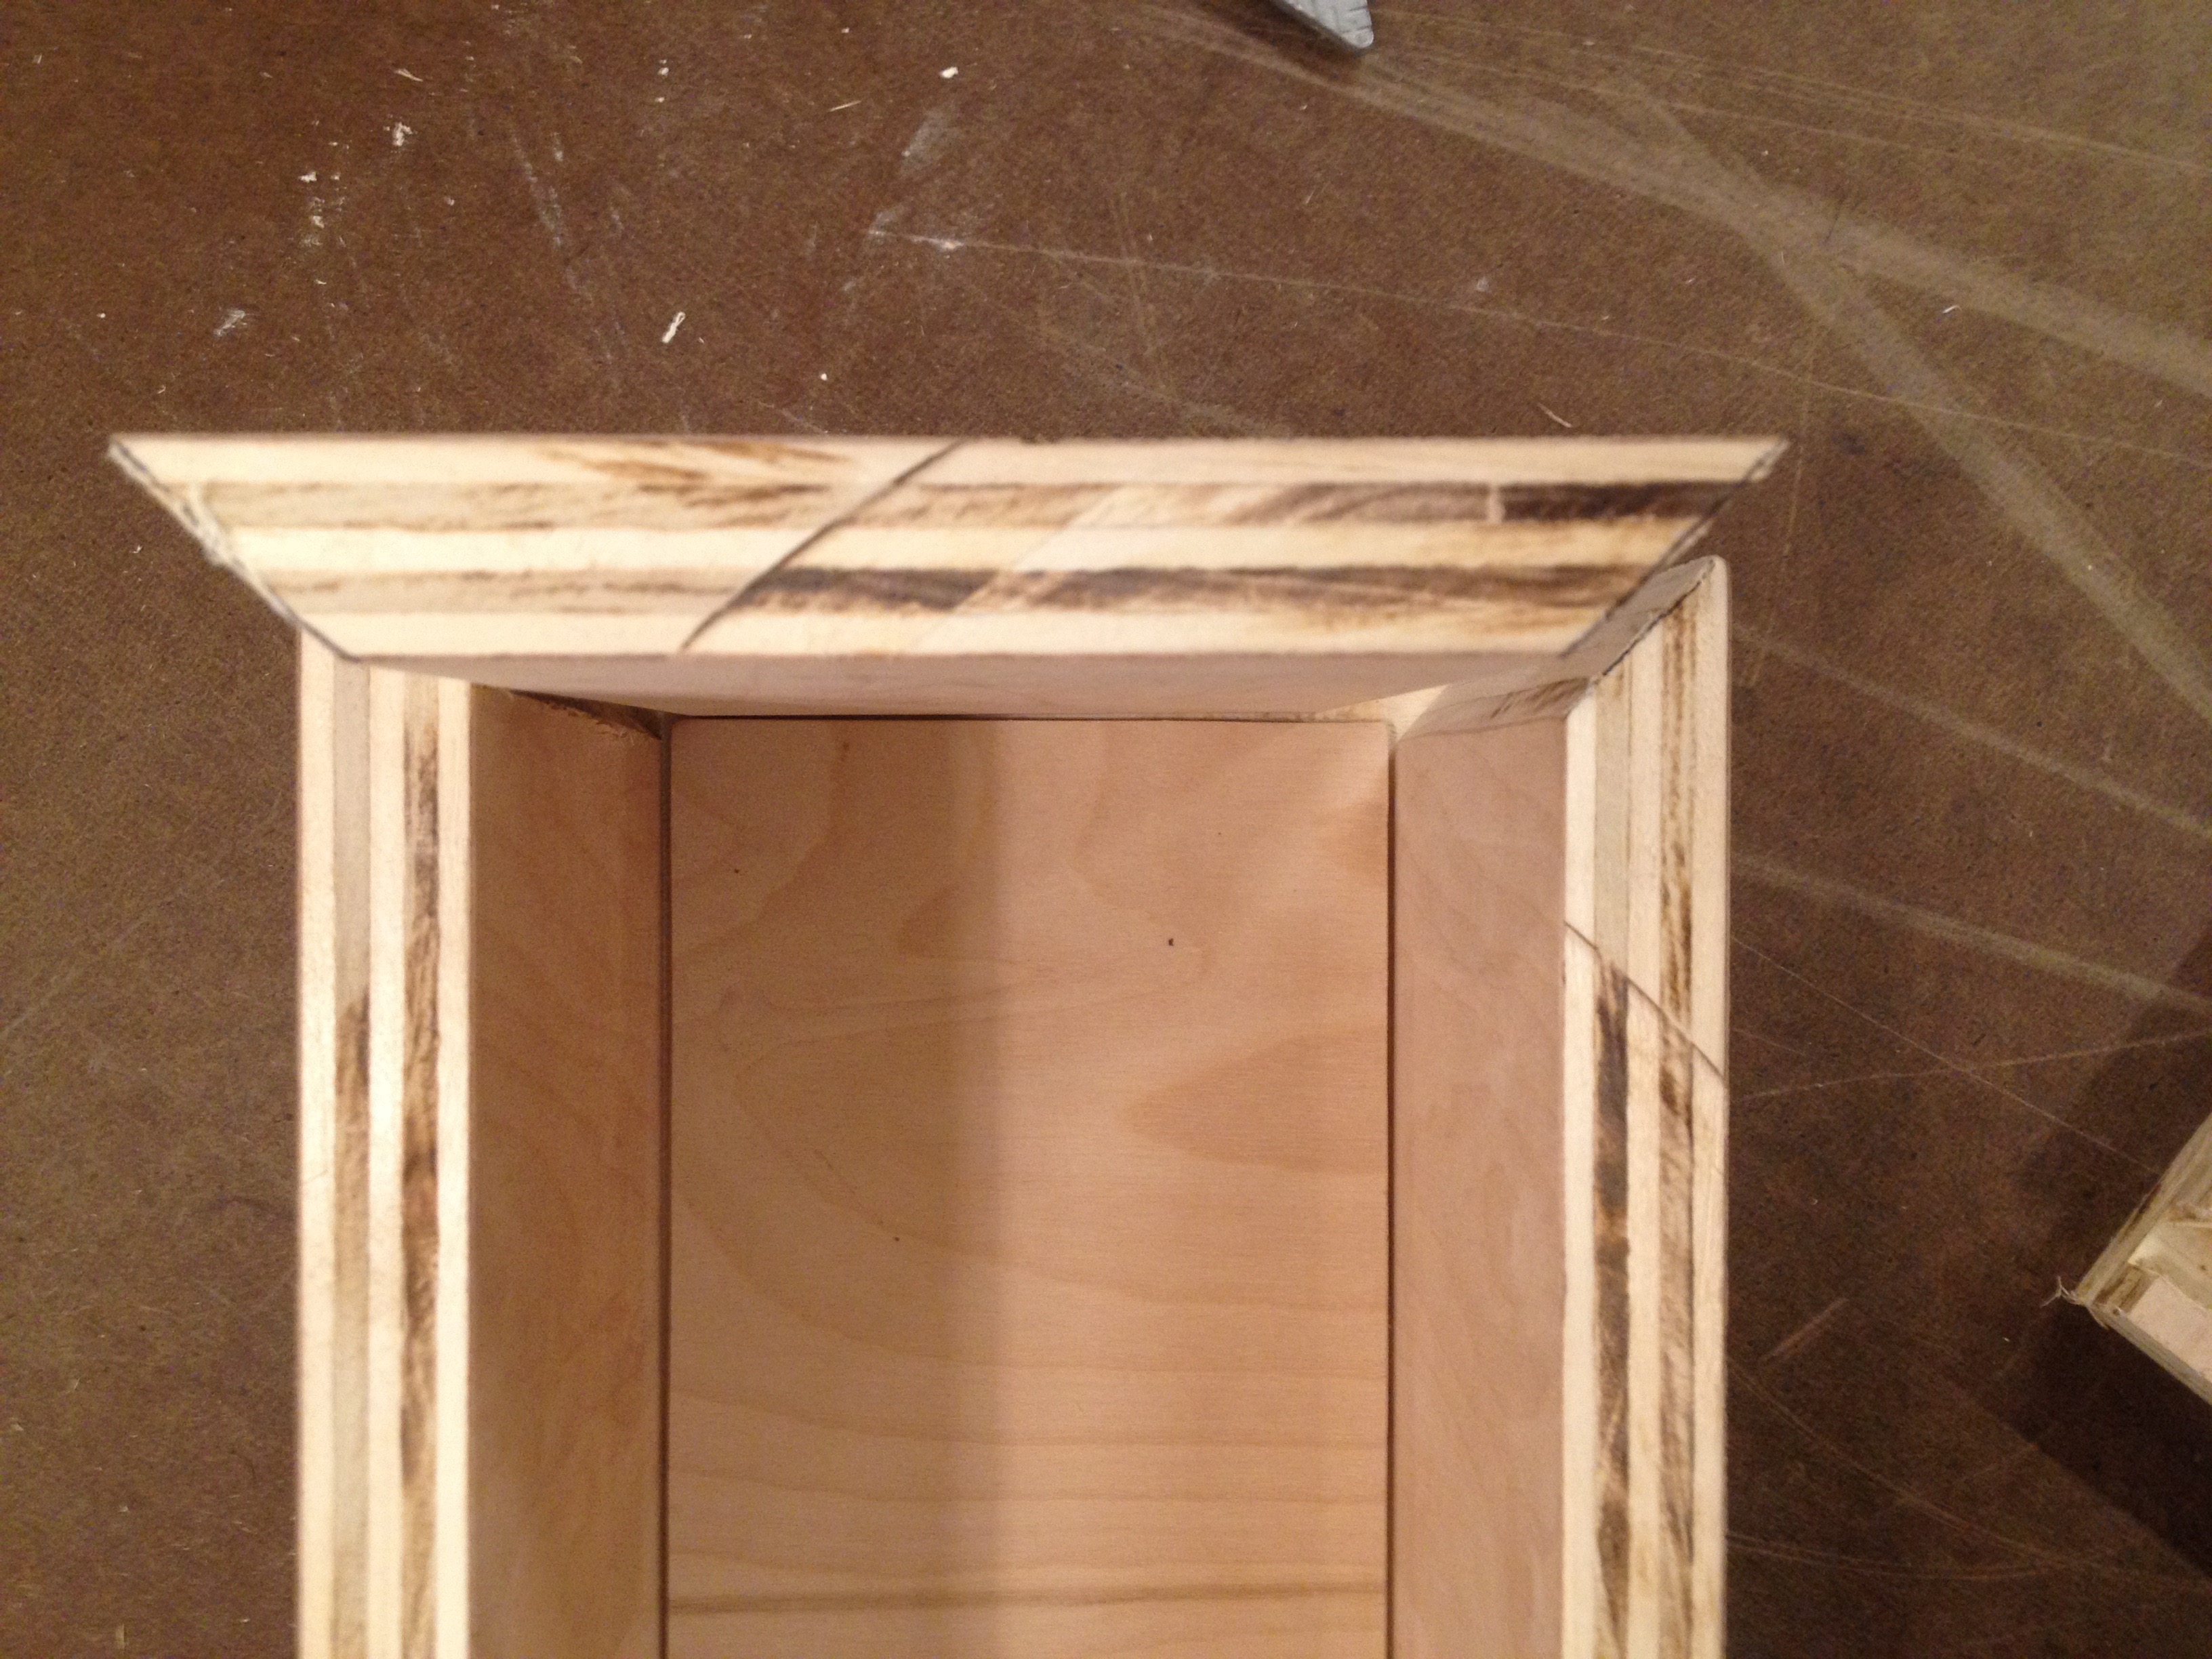
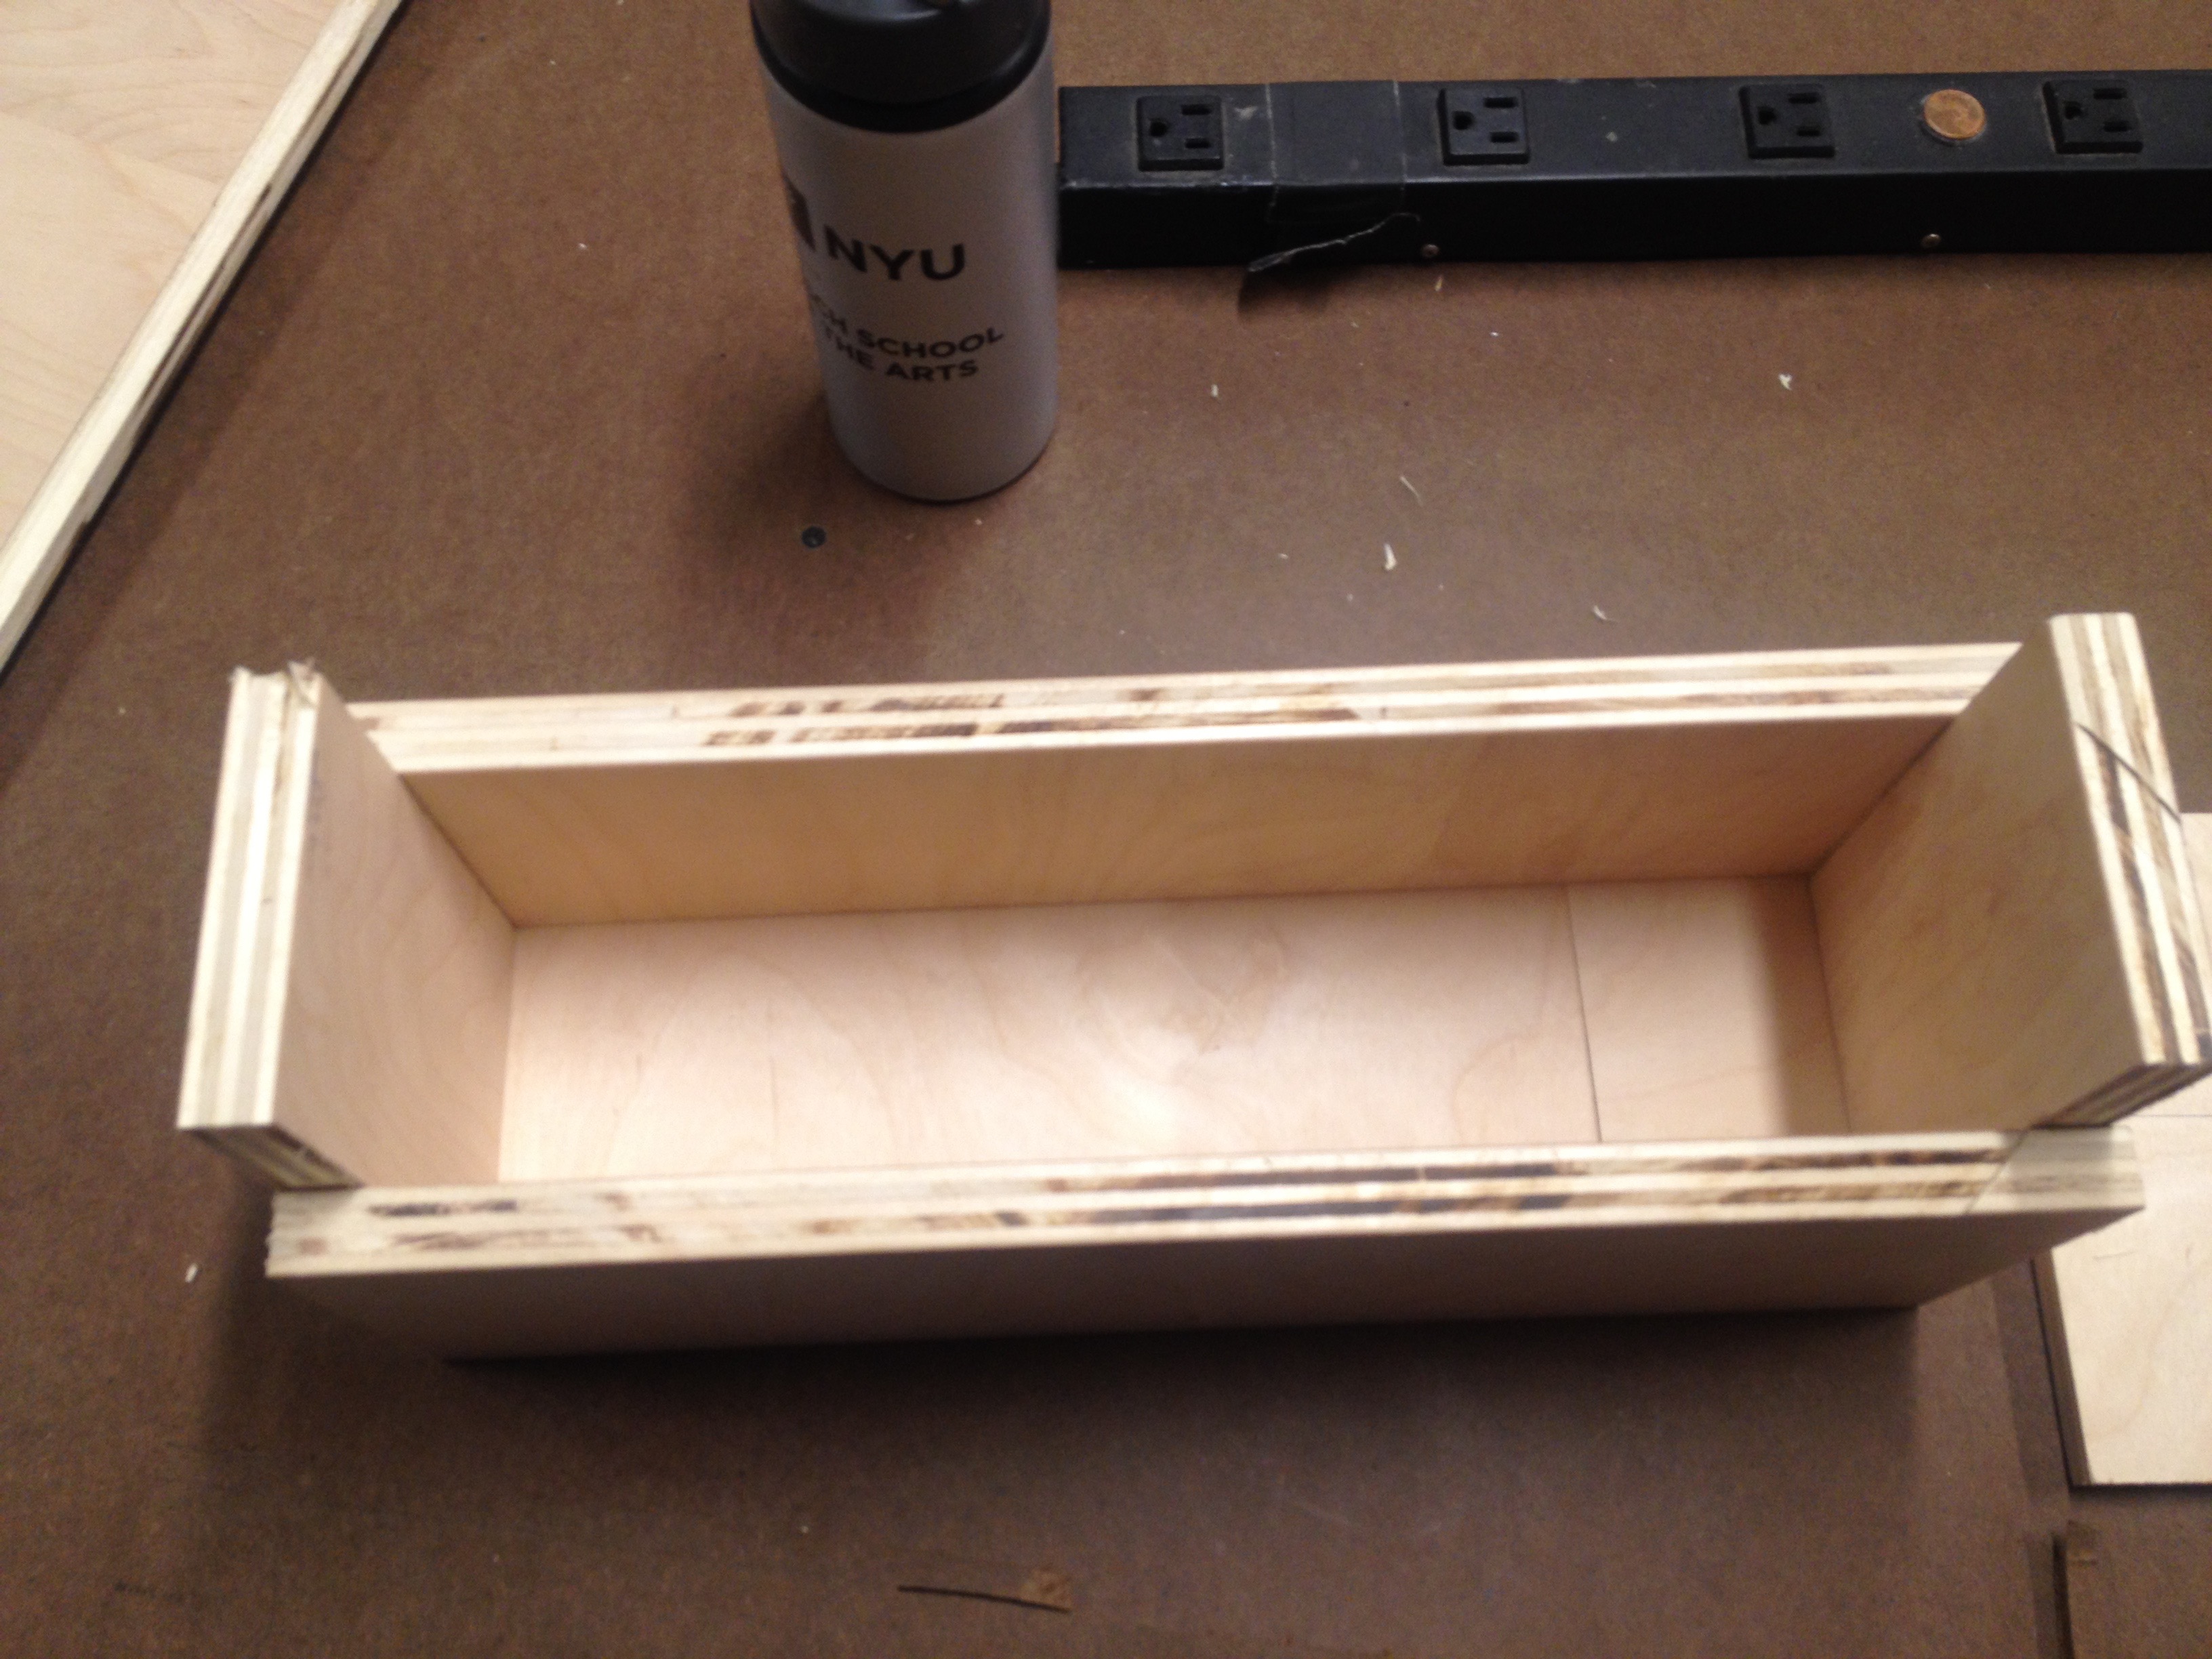
E. [Machine Saw] I did not want to invest more time to trim down the thick bottom on the router, so I used the thinner plywood. Also I cut off the 45° surface to make 90°.

F. [Machine Saw, Speed Square, Ruler] Since the thinner board was shorter, I made two pieces to fit in the bottom. I cut them and assemble them.


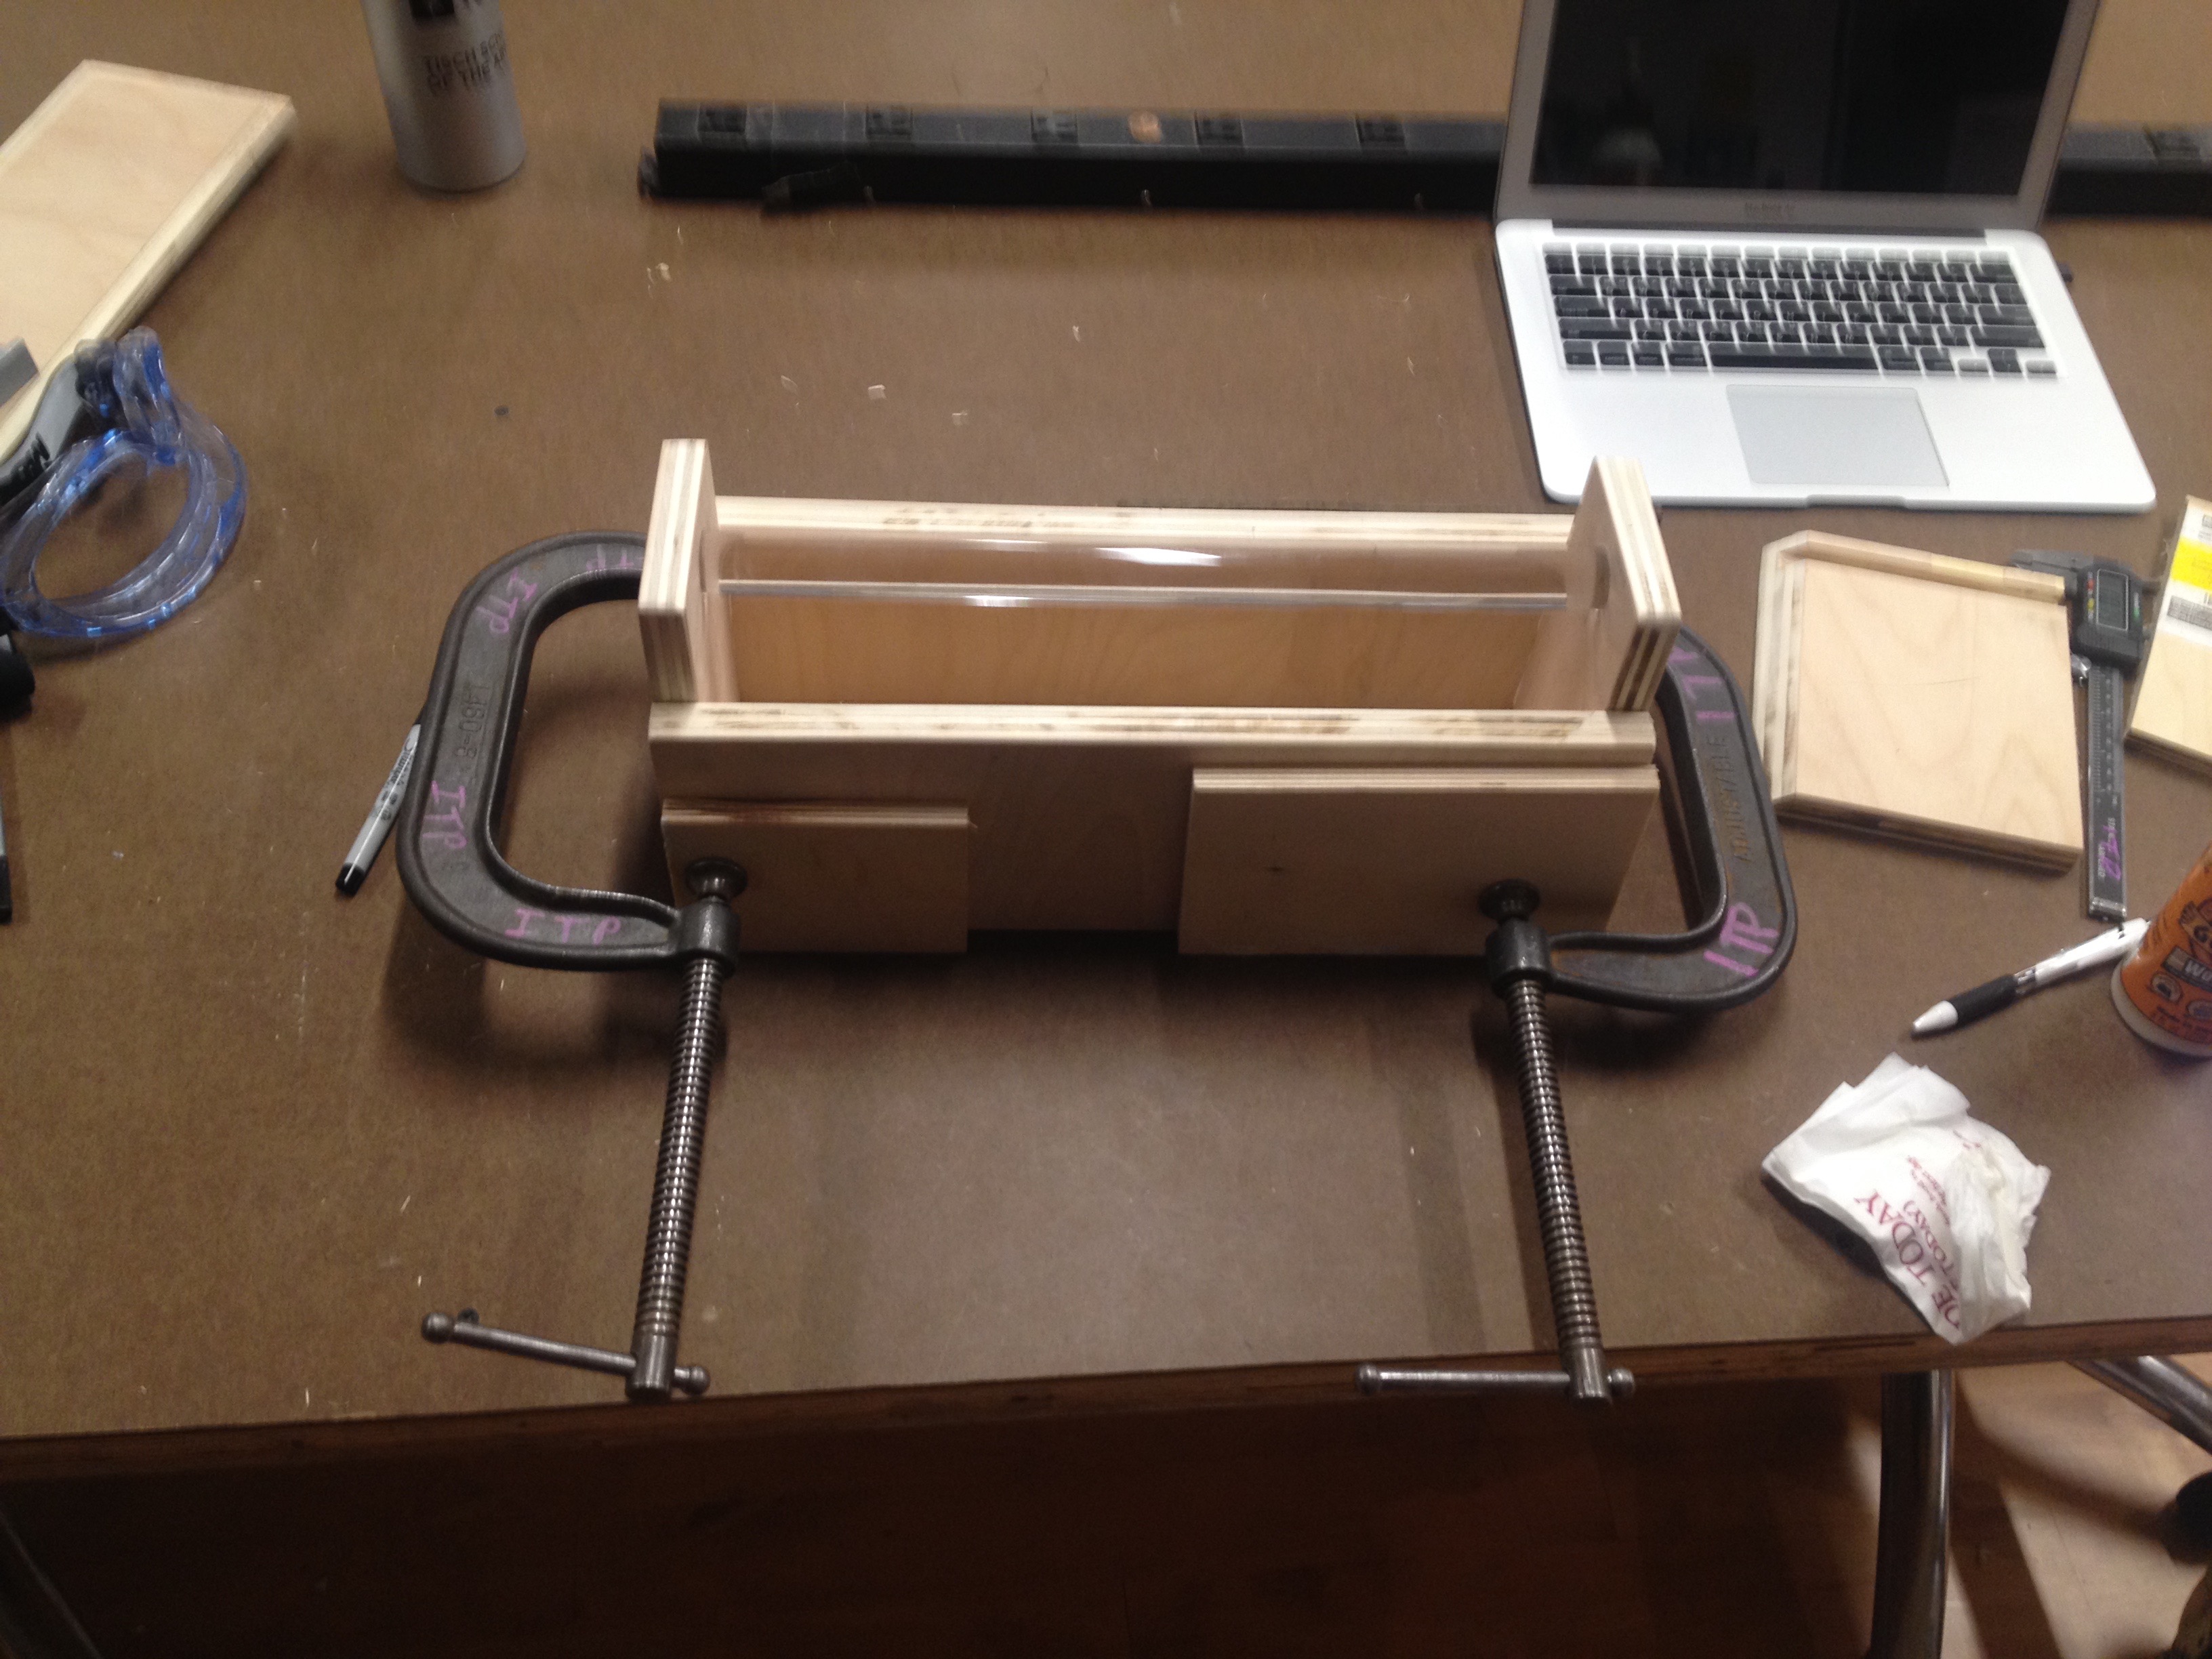
G . [Band Saw, Drill Press, Spade Bit (Forstner Bit Recommended)] I used the band saw to cut the Acrylic bar. And I used the drill press to make holes for the bar. Since the shop had spade bit, I used it to make holes. I marked the depth of the hole on the bit before drilling so that I can prevent drilling through.


H.[Glue, C-Clamp, Laser Cutter] I used a wood glue to hold them together. I used buffer plates in-between the C-clamp. I waited until the glue drys and used laser cutter to raster etching. counter bolt to hold them tight.

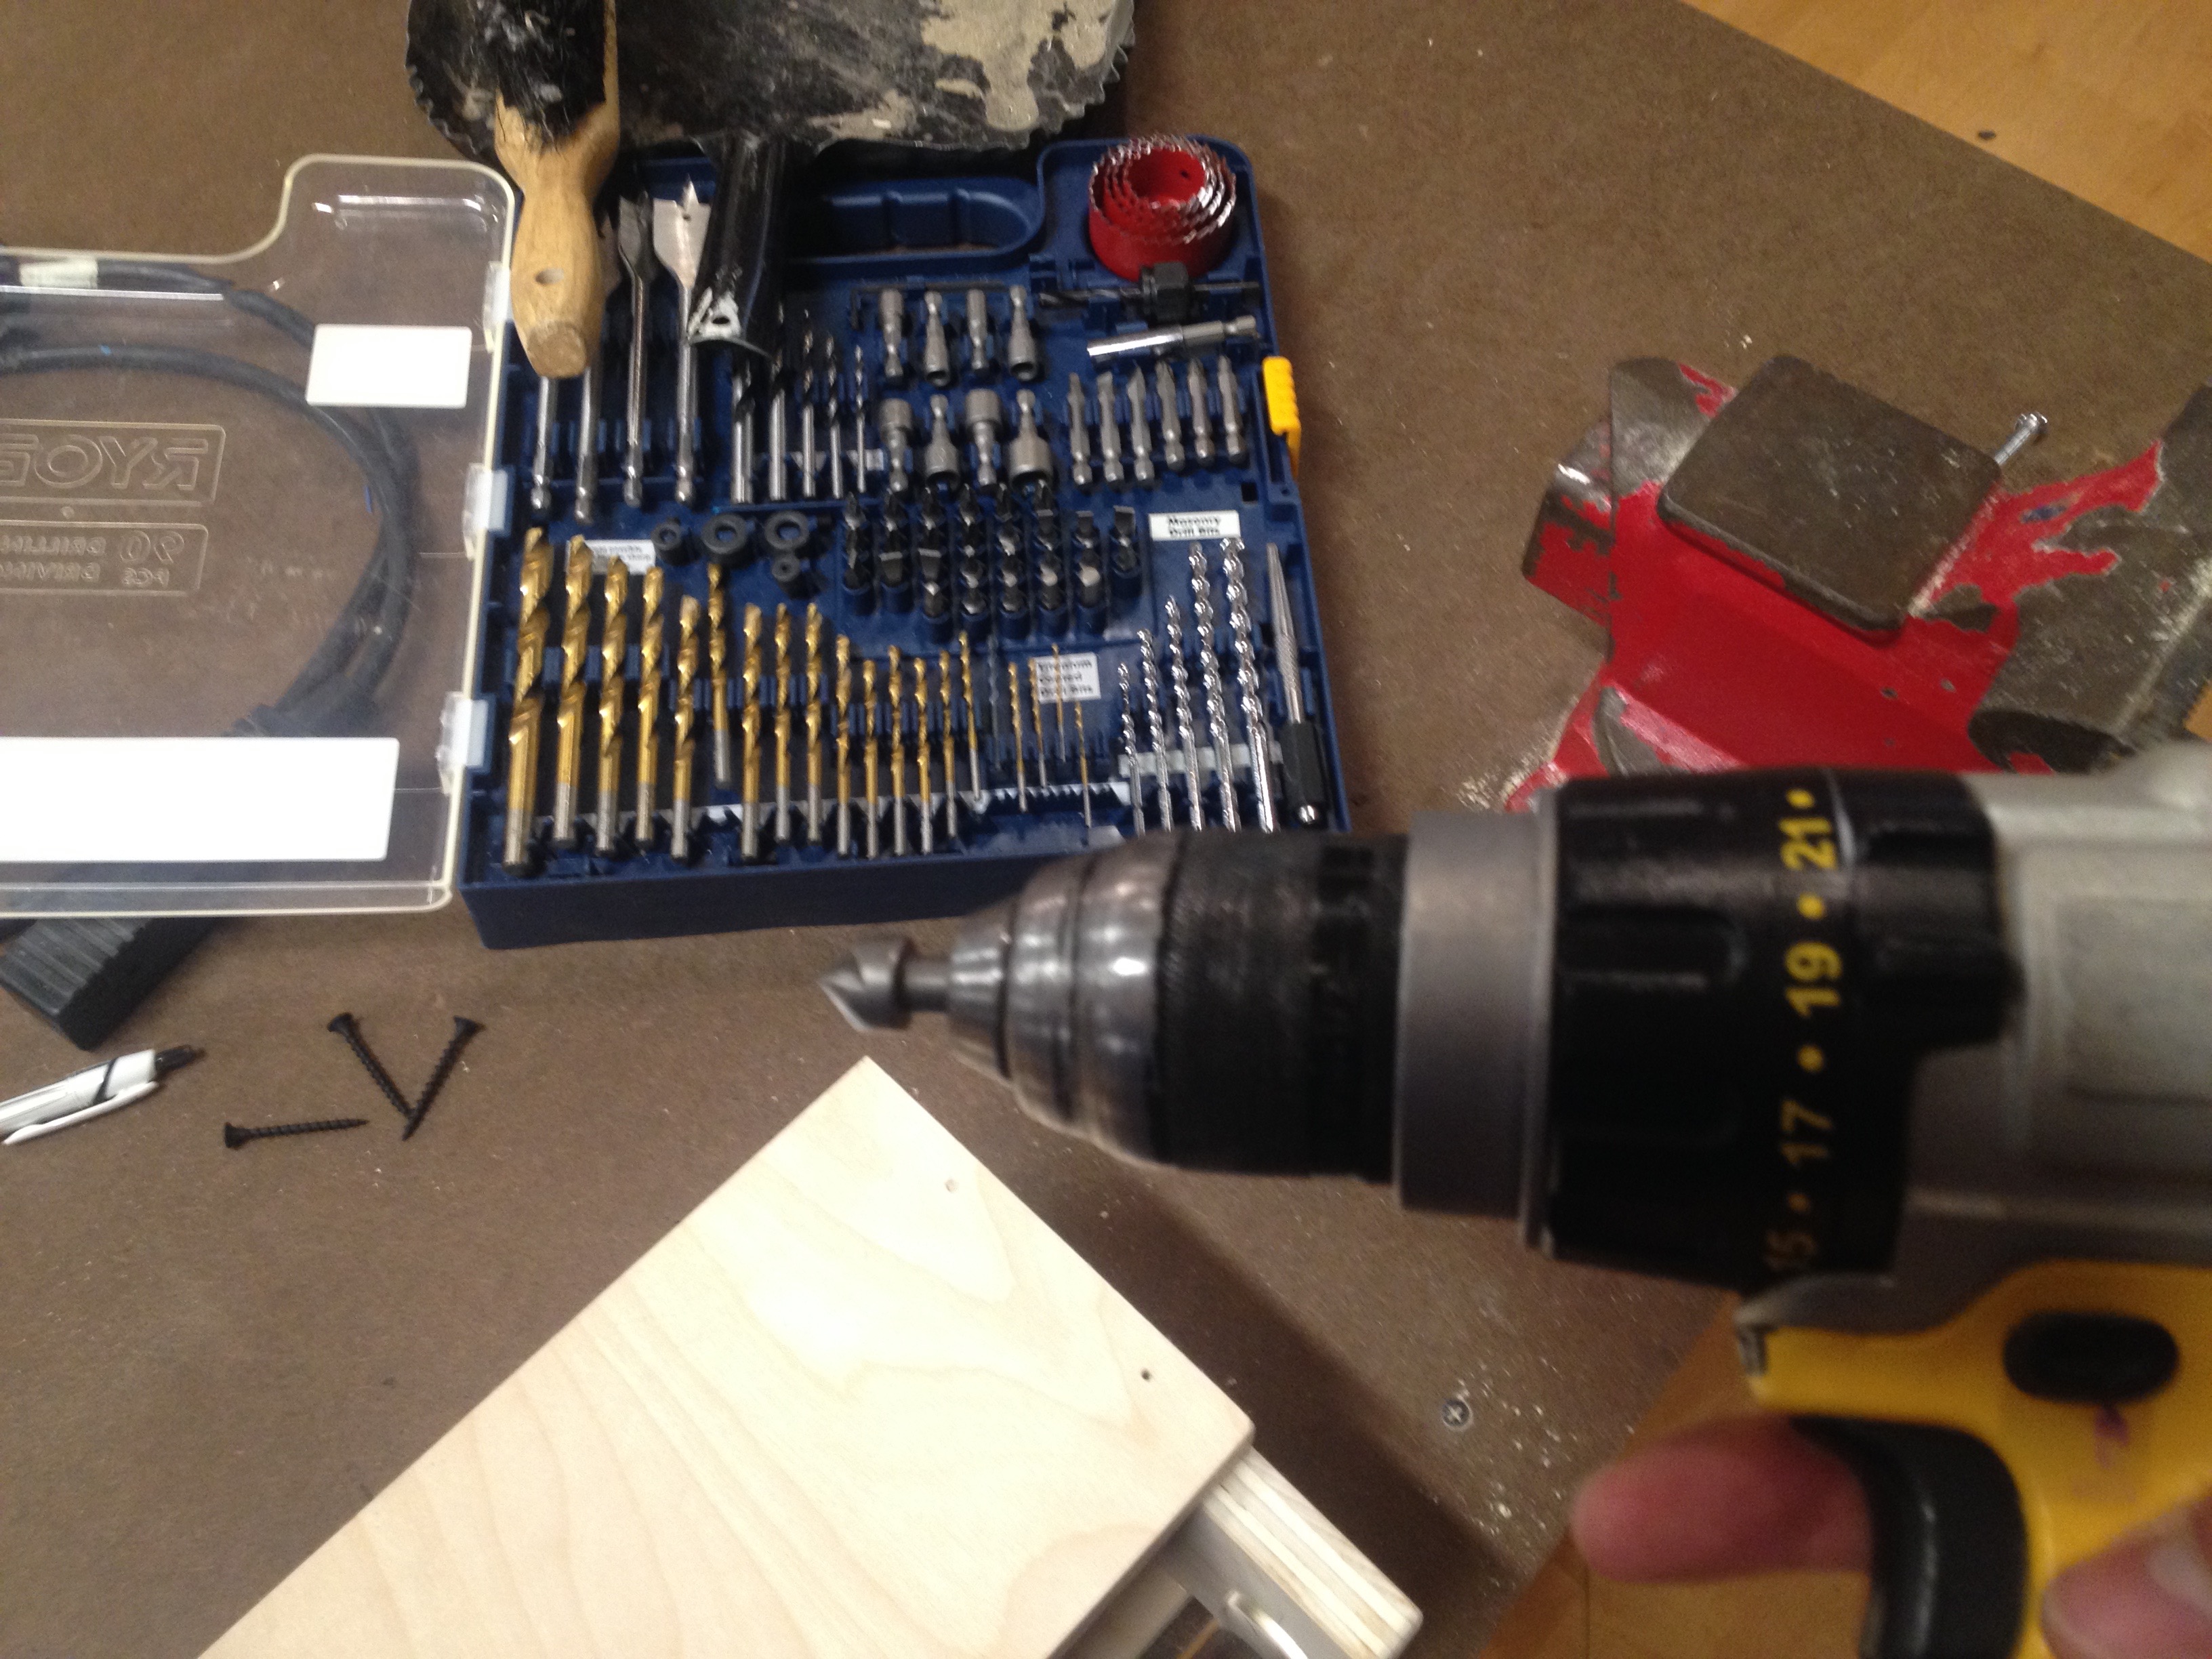
I. [Drill, Drill bit, Shank Counter bit, Counter Bolt] Since I wanted the box to be strong, I decided to use counter bolt to hold them together. Since there was no counter bit, I used drill bit to make holes first and used shank counter bit to make rooms for the counter bolts. After drilling, I put bolts in and the black bolts stood out nicely.


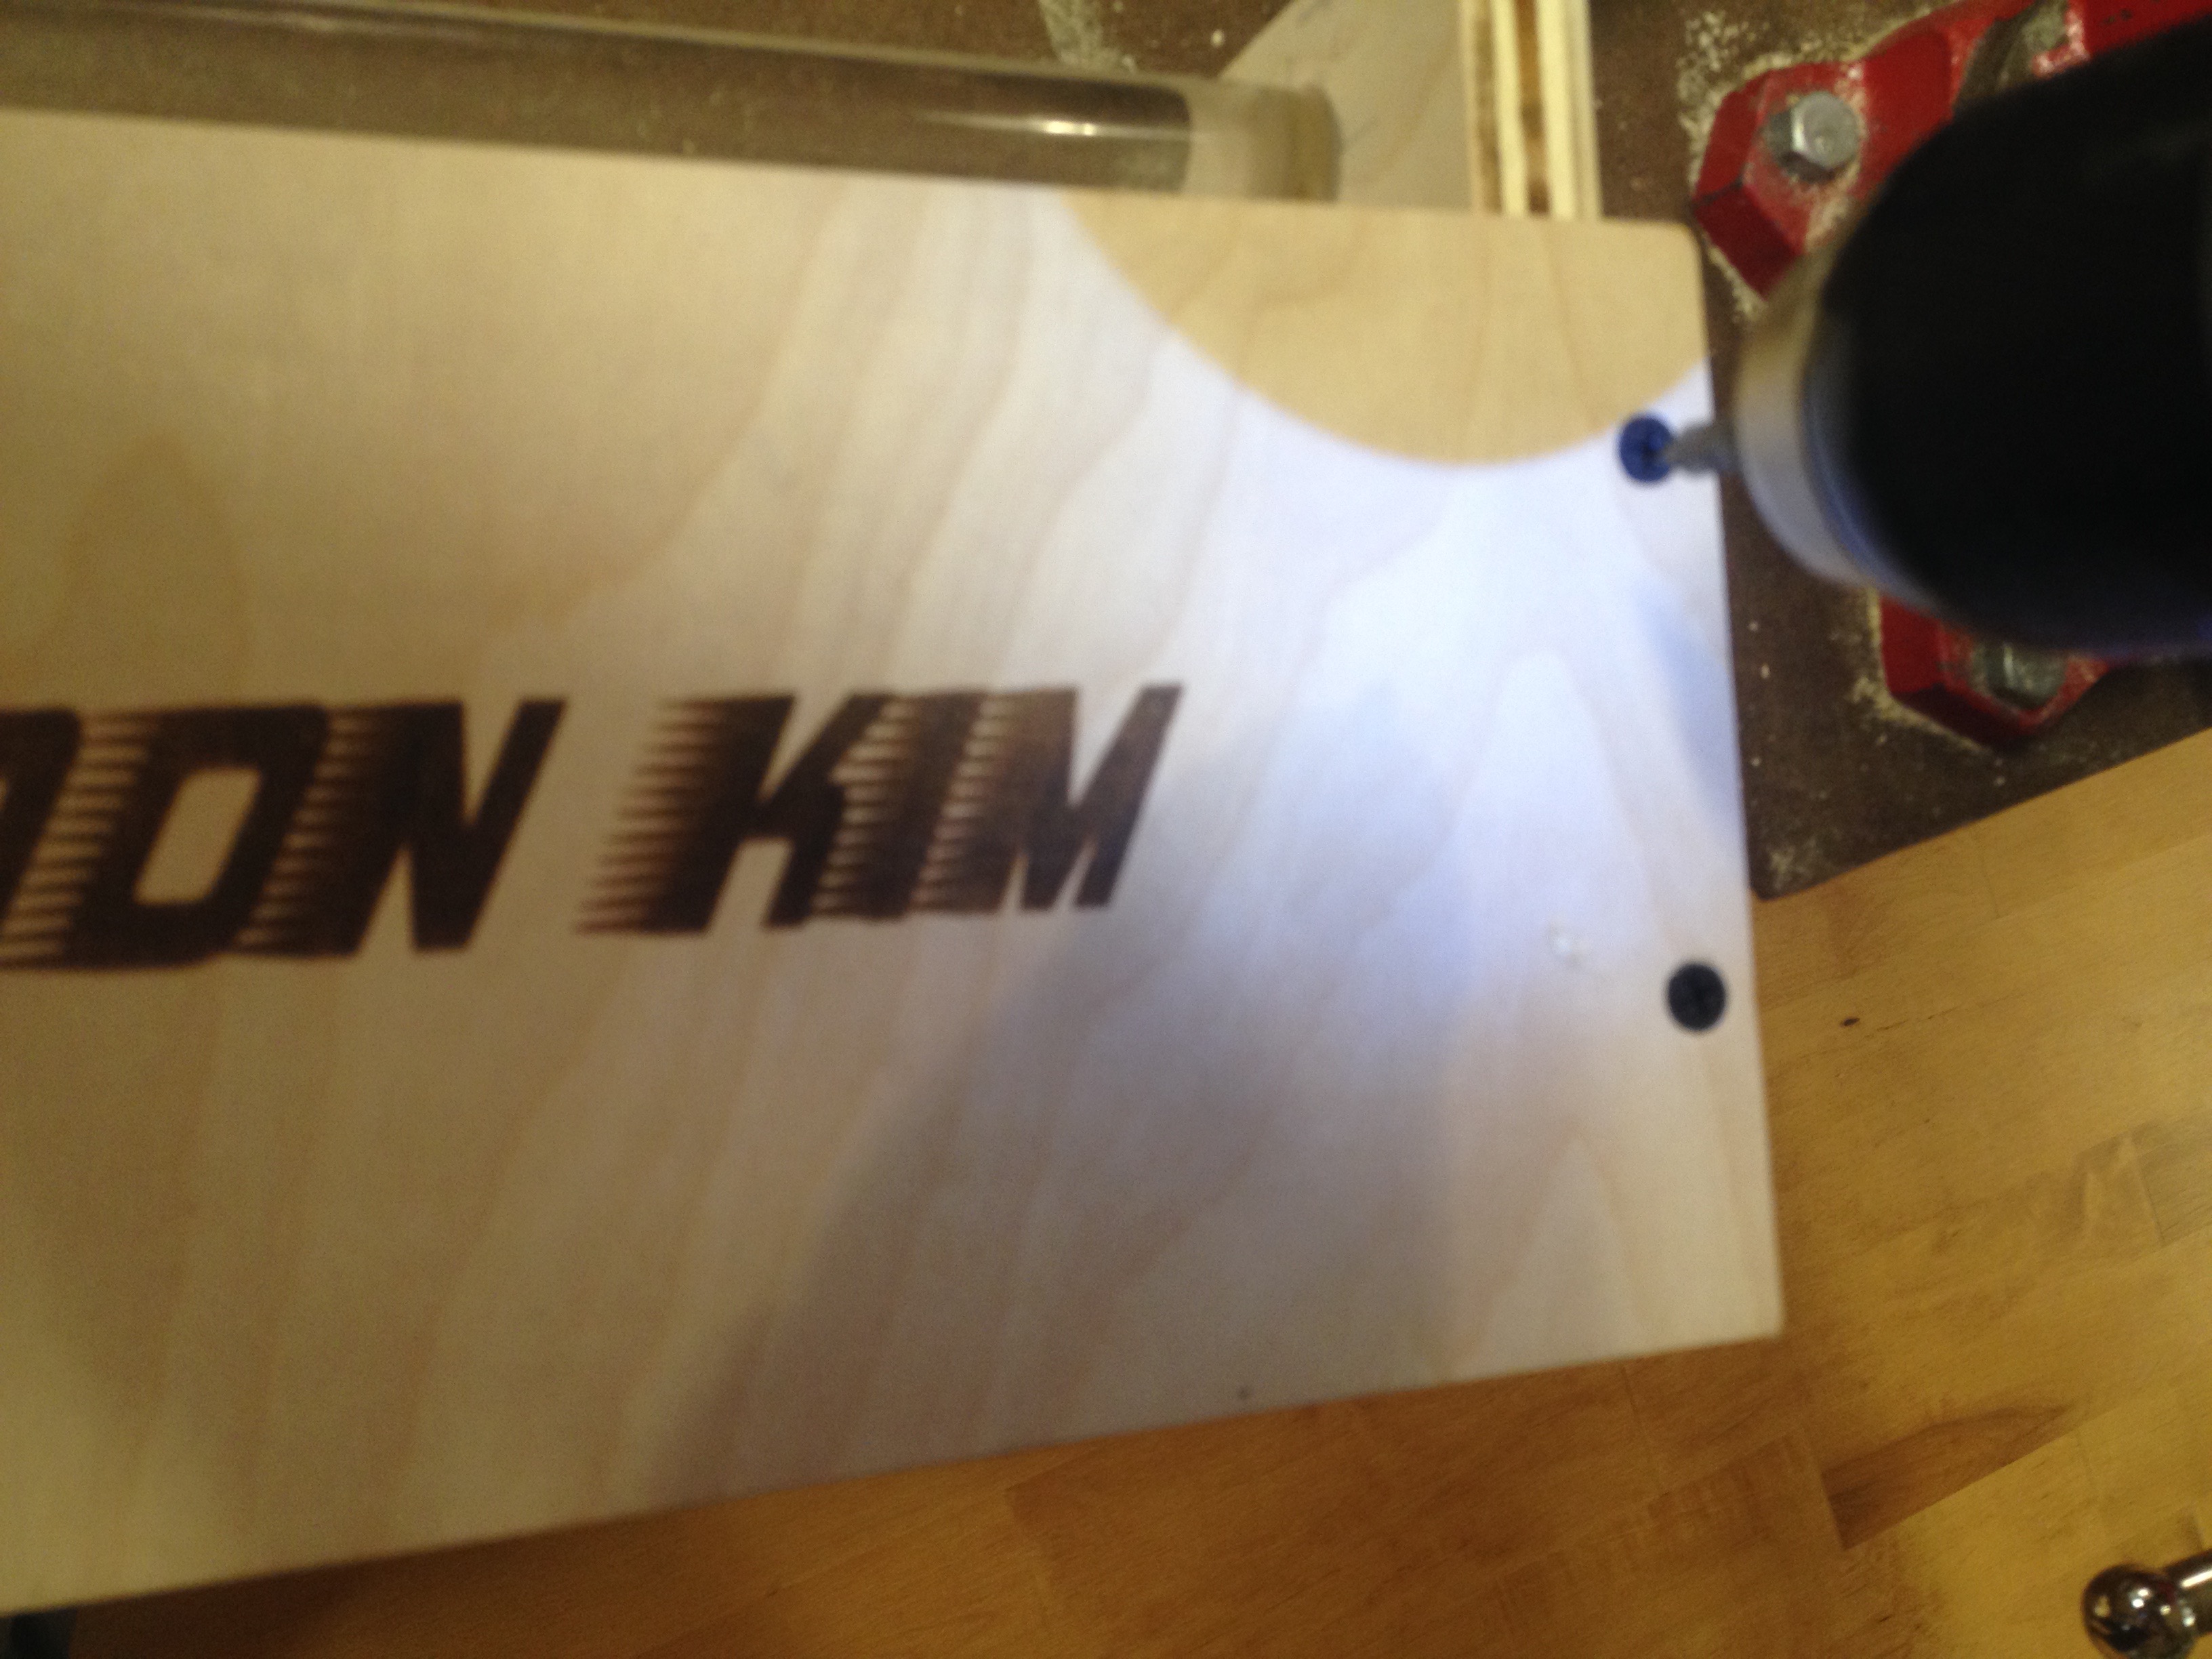

J. [Scissors, Black Foam Paper] I used a Black foam paper to fill in the holes made by the router because the counter bolts were black, I wanted to match them.

4. Completion


Pingback: TOOL BOX | doyoki.com
Great work. The tool box turned out nicely. I can see yo finishing it with some sort of wood oil.
LikeLike